PVE Node Router and SDN
Running services on a PVE node is a perfect place to simulate networking. For the basic setup, we are to use SDN and OPNsense. Setting up a virtual or dedicated NIC as WAN and set up an SDN network for our VM/CT to use.

The smallest size router would be to set up a Linux Server as a router on a minimal VM, and using the CLI.
But, we want an GUI, that's why we use OPNsense.
Why use a Router and SDN
One use case is to simulate a custom environment and the networking for it.
Simulate a SOHO environment
Setting up a NGFW in one VM and use SDN to simulate the internal networking. Use a set of VM/CT to simulate workstations. Setting up VLAN access and firewall rules is better simulated before implementation.
Creating a Restricted Lab on a LAN
In an office environment, you can create a restricted and secure environment by routing the Lab stuff so it doesn't interact with the normal traffic and normal users can't access the Lab. Typically, an office with on-site SW development and production on the same network. My personal experience of such a setup was great. R&D and SW Development could access any data on the official network for getting test data, but the test versions stayed secure in the lab environment.
Set up SDN
We are about to generate an internal subnet on a node for all VM/CT to use. The Router is to be connected to a wan or an internal network, or both. All depending on the use case.
Create an SDN network and a subnet
All names and IP numbers should be according to your network strategy.
Go to Datacenter→ SDN → ZONES and
- Create a
Sinple ZonecalledOPNzonethen - Create a
VNet, calledOPNvnetaliasNETpve1(inDatacenter→SDN→VNets) - Select the VNet and create it's
subnetwith 10.10.1.0/24 and GW 10.10.1.1. - Then return to
Datacenter→SDNand activate
Install and Setup OPNsense
Install OPNsense on a VM, as we are to use FreeBSD and potentially have it facing the Internet. You can see my OPNsense blog post for details.
Installation is done using the console of the VM. Credentials: user installer and password opnsense then do the installation and change the root password before rebooting.
Setting up the OPNsense will then be done using a Desktop on that node on IP 192.168.1.1.
- WAN1: a dedicated (passed) USB NIC, it will show up after the initial installation as ue0
- WAN2: a bridge like vmbr0 for connection to the local LAN (Optional)
- LAN: we use the OPNvnet we created in SDN
Use a VM for Setting up and Testing
For testing and setting up the OPNsense instance, we use a Desktop VM of our choice.
For me, it's a minimalistic Alpine Desktop VM, see my post: Install an Alpine Desktop VM.
Leave the DHCP on for detecting the IP, it will change during the setup of OPNsense.
Virtual Machine sizing
- Processor: 1 or more virtual cores
- RAM: Minimum required RAM is ≥ 4 GB
- Install method: ISO
- Install target: Minimum recommended virtual disk size of 8 GB
Configuring OPNsense
Using the Desktop VM, open a browser to 192.168.1.1 (default for OPNsense). Start the configuration of your OPNsense router. User: root and the password set by installation.
Now we shall change that and update the system and the rest of the configuration.
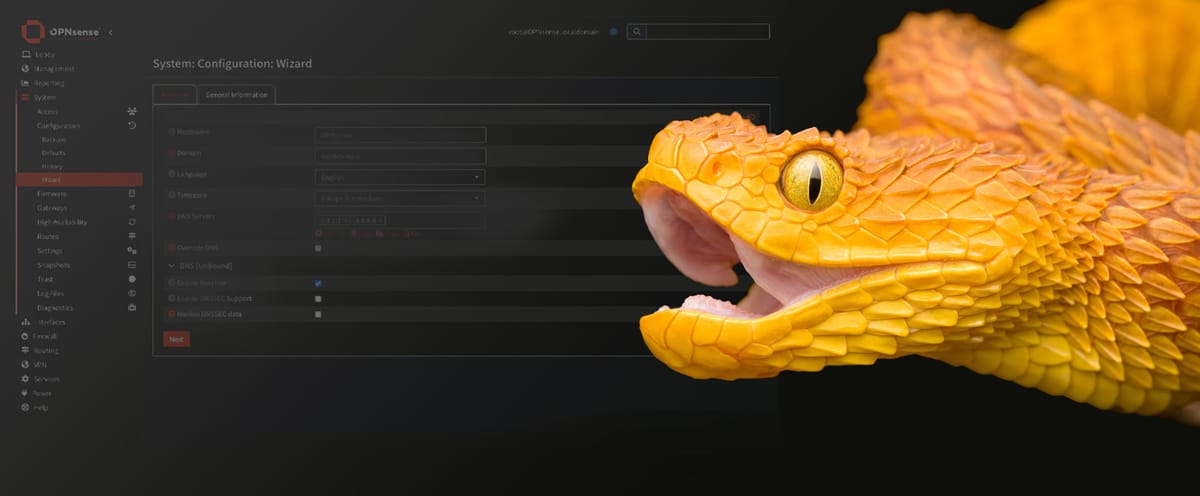
- Run the Wizard
System→Configuration→Wizardand set the General information like host name, language, TZ, language and DNS- Set the gateway (the main gateway of your lab for internet), should be there automatically.
Choose if you are to use IPv4 and/or IPv6 - Set the new LAN address. Check the SDN and use the IP for that gateway
Choose if you are to use IPv4 and/or IPv6 - Set the new password for
root
- Set the gateway (the main gateway of your lab for internet), should be there automatically.
- Reboot the OPNsense VM
- Reboot the test VM
- Login using the new IP
- test with
ip rfor the new IP - pinging your upstream router by IP
- ping by FQDN something like
google.com
- test with
- Update the system and install your plugins, go to
System→Firmware→Status- Click
🔁 Check for updatesand do the update! - Add the
os-qemu-guest-admin,os-iperfand others from the community plugin
- Click
- If you have more WAN and/or LAN connections, set up and test
- In
Basic configuration→Lockcheck☑️ Prevent interface removal - In
Generic configurationset the right parameters for your networkIPv4 Configuration TypesetNone/Static IPv4/DHCPIPv6 Configuration TypesetNone/Static IPv6/SLAAC/6rd Tunnel/6to4 Tunnel/Track Interface- If you don't use IPv6, just set to
None
- Save your settings and Apply changes
- In
- Set up the firewall rules and other tools
References
OPNsense homepage, GitHub, Documentation, Official Shop, Dnsmasq homepage and man page, faq.
But, you can also choose to use the ISC tools: Bind 9 homepage, Kea DHCP Manual and official homepage, ISC DHCP homepage and Migrating to Kea from ISC DHCP page ↩︎Alpine Linux homepage, GitLab, , Documentation, Downloads ↩︎


