Install an Alpine Desktop VM
Sometimes you need a small desktop on the cluster to do stuff. Alpine is a pure Linux OS, it's tiny. Adding a desktop, and it's there, a lightweight, minimalistic and customizable Linux experience in a VM. It uses Open RC, not Systemd.


Alpine Linux is widely used in containerized environments like Docker images. Why, its small size, fast boot time, and reduced attack surface and enabling efficient resource utilization.
Nice things about Alpine
- Minimalistic: Alpine Linux is designed to be lightweight, making it ideal for resource-constrained systems (minimal disk space and low memory requirements). But, still or because of it good performance.
- Enhanced security: Alpine has a strong emphasis on security practices and advanced measures such as stack protection, hardened kernel, and Address Space Layout Randomization (ASLR). Skipping the normal bloat and use a minimal package set reduces the attack surface and ensures a more secure desktop environment.
- APK : Alpine Package Keeper lets you choose from many lightweight window managers, desktop environments, and a vast repository of software packages.
- Active Community Support
- Open RC instead of the gigantic systemd
- No Gnome to keep it small as possible
Installation
Download the ISO image Visit the download page and for AMD64 architectures click the “x86_64” button in the “STANDARD” section, less than 220 MB.
Create a small VM and use that image, 1-2 GB memory and 8-12 GB disk. The reason we use so many resources is that we will create a Desktop. Here you may like to set the CPU Resources Limits, 2 cores but limit to 1.0 (2 * 50%).
Start and login as root, no password.
Start the Alpine Linux Installation
Type setup-alpine and press Enter to begin the Alpine installation.
If you do don't know what to answer, use the ? if available.
Any mistake can be corrected by re-running the setup-alpine.

- Next enter the hostname as FQDN, e.g., foo.example.com
- Next enter networking details IP (192.0.2.39) address or DHCP.
Net mask 255.255.255.0, GW (192.0.2.1) - Next is the DNS domain name and the DNS servers
- Next, use a proxy or answer none
- Next the important step root password, New password: enter a long and complicated one
- Next your timezone, (I used to work for multinationals, and it was all UTC) Enter the Region/Capital to select. For more info, see Reference below.
- Next select an Alpine Linux mirror (random, detect and fastest or edit)
- Enable the Community repo by hitting
c
- Enable the Community repo by hitting

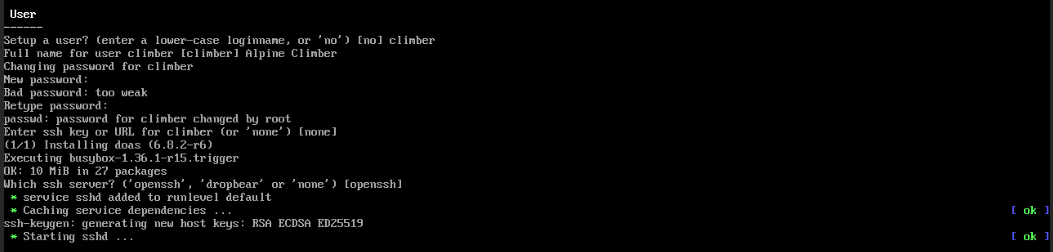
Add a normal user. We don't like running things as root, it's dangerous. If you don't have an SSH key for the user, you need to add it later for security reasons. Select your SSH server, OpenSSH is default.
- Next select the disk,
sdaand select how to use it
Choose between the following options :- System disk mode (sys): a traditional hard-disk install that creates three partitions on the selected storage device, “/boot,” “swap,” and “/” (the file system root). Most suitable for generic desktop machines.
- Data disk mode (data): This mode runs from system RAM but swaps storage, and the entire “/var” directory gets mounted from a persistent storage device. Helpful in having RAM-accelerated servers.
- Crypt: As the names suggest, you can set up an encrypted LUKS volume. You will be asked again for “sys” or “data” mode.
- LVM: Enable logical volume manager and ask again for “sys” or “data” mode.
For a desktop system, we select sys mode, confirm by hitting Enter.

All done, please reboot and add the key for your user.
Post Installation Steps
Add the community repo
Edit the vi /etc/apk/repositories file and remove the comment (#) before the community repository line to enable it, if you didn't do it at install.
Add a shell and other tools
Next, we’ll install a Bash shell (by default it's sh) and the sudo (by default it's doas) command or create an alias sudo=doas. Finally, we’ll add our user to the “wheel” group so that we can execute commands with root privileges and set his default shell to Bash. Edit according to your needs:
apk add bash bash-completion sudo shadow
echo '%wheel ALL=(ALL) ALL' > /etc/sudoers.d/wheel
adduser climber wheel
usermod -s /bin/bash climber
Here, we add the user "climber" – use your <username> instead!
Reboot the system
Adding the community repo
If you need things like the QEMU-Guest-Agent or sudo, you need to activate the community repo. Edit the file /etc/apk/repositories and remove the # in front of the …/community lines. Install it by:
apk add qemu-guest-agentSetup X-window
Alpine Linux provides users with the setup-xorg-base command to automatically install all needed packages for running a desktop environment.
setup-xorg-baseInstall Xfce on Alpine Linux
Xfce is lightweight, efficient, and visually appealing while using minimal system resources desktop environment, so it’s a perfect match for your Alpine system.
Add the basic tools, add your favorites
apk add xfce4 xfce4-terminal xfce4-screensaver lightdm-gtk-greeter dbus firefoxInstall additional fonts, if needed:
apk add font-awesome font-dejavu font-inconsolata font-liberation font-noto font-noto-cjk font-noto-extra font-terminus Enabled Light DM and D-Bus services to start up on boot automatically:
rc-update add dbus
rc-update add lightdm
Reboot the system
After the reboot, you have a xfce desktop
Other useful commands
Change the Keymap
At first log in, your keyboard is US, change to yours by opening a terminal and issue this command:
doas setup-keymapChange the Desktop Keyboard Layout
Open Applications → Settings → Keyboard → Layout and Uncheck Use system defaults and hit + to add a keyboard layout. After adding one, you may delete the standard keyboard layout.
Change the Timezone
If you need to change the timezone from what you chose at initial configuring the VM:
This will add necessary setup scripts on Alpine, if not present:
apk add --update alpine-conf tzdataTo actually change the Timezone, run the following command:
setup-timezone -z Europe/BerlinYou can now remove setup scripts package, if required:
apk del alpine-confReferences
Alpine Linux [1] Alpine Wiki [2] TZ [3]
Alpine Linux homepage, getting started User Handbook, Downloads ↩︎
See the Alpine Linux Wiki, Alpine Setup Scripts ↩︎
Difference with UTC, GMT and ZULU time timeanddate.com, Zulu (military/aviation) is just the synonym for UTC and always 24 h. Non of them useses DST. Multinationals usees UTC, List of TZ database wikipedia, the TZ DB wikipedia ↩︎


