The hidden lab – by VXLAN
Our Proxmox lab shall be hidden away from the wife and kids. How to use Software Defined Networking SDN, VXLAN, OPNsense and a VM to run our Lab hided away from the family. Create a personal space for testing stuff. Use Pi-hole as an alternative to other DNS.


A personal space for testing stuff
Configure Software Defined Networking SDN
If you have upgrade from an earlier Proxmox version, you need to ensure that all the dependencies are installed.
apt install libpve-network-perl ifupdown2Then as the last step to enable SDN is to add, if missing, a line to the end pf the interface configuration file, /etc/network/interfaces, on every host.
source /etc/network/interfaces.d/*“You don't have to be great to start, but you have to start to be great.”
Zig Ziglar
Adding a VXLAN to the Lab Network
Configuring a software defined network in Proxmox consists of three steps for each network. We will add a Firewall router with DNS and DHCP.
- Configure one or more Zone
- Configure one or more VNet
- We will add a Firewall
- If not using a Firewall, configure the Subnet for each VXLAN, if you want to assign an IP range
Adding a VXLAN zone
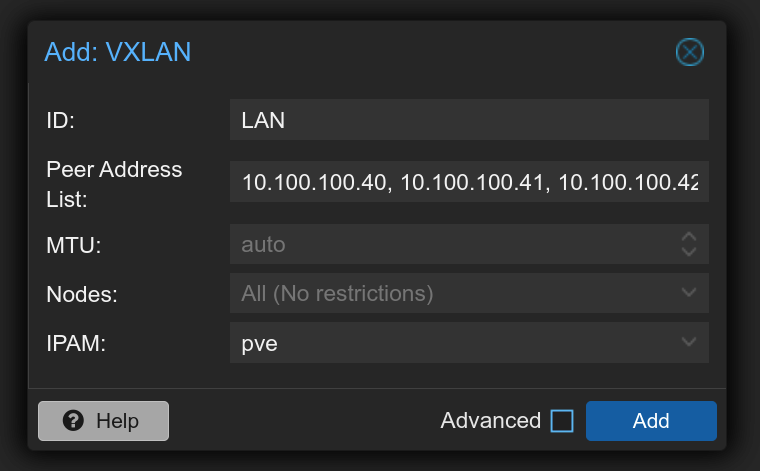
To add a VXLAN zone, you select that zone type in the Datacenter SDN interface. According to Proxmox SDN documentation, you need to set the MTU to a slightly lower value than the standard 1500 – 1450.
Zone LAN
- ID:
LAN - Peer Address List:
10.100.100.40, 10.100.100.41, 10.100.100.42 - MTU:
1450or leave asauto
Zone DMZ
- ID:
DMZ - Peer Address List:
10.10.10.40, 10.10.10.41, 10.10.10.42 - MTU:
1450or leave asauto
Adding VNet's and Subnets
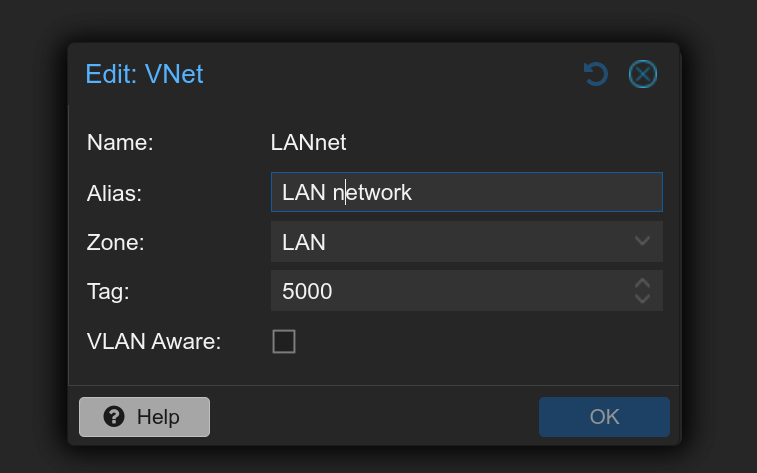
Now, add the associated VNet's and Subnets to each zone.
VNet LAN
- Name:
LANnet - Alias:
LAN network - Zone:
LAN - Tag:
5000
VNet DMZ
- Name:
DMZnet - Alias:
DMZ network - Zone:
DMZ - Tag:
6000
Go to Datacenter → SDN and click on [Apply]
That’s all there is to it.
Next, we create a virtual firewall running pfSense or OPNsense and configure the WAN, LAN, and DMZ interfaces.
Linux Admin VM
For making housekeeping tasks to the firewall and around the cluster, we install our Management Desktop as an VM. Then it's just to fire it up, when we need to run Ansible or something else. Below is my settings.
- Name: Ubuntu Desktop or whatever your favorite is
- Start on boot:
no - ISO image:
ubuntu-24.04.1-desktop-amd64.iso - System:
defaults - Disk size:
32 GB - CPU:
1 socket / 2 cores - Memory:
2048MB - Network:
LANnet / MTU 1450
sudo systemctl restart systemd-networkd
OPNsense VM
We use OPNsense for our firewall. Go to opnsense.org and download the latest, 24.7 Thriving Tiger ISO amd64-image. More details about installing in this blog.
- Select
amd64anddvd - Check the SHA-256 checksum. Extended checks, see this documentation page
- Extract the
OPNsense-24.7-vga-amd64.iso.bz2file
bzip2 -d OPNsense-24.7-vga-amd64.iso.bz2- Upload
OPNsense-24.7-vga-amd64.isoto your ISO storage.
We create a VM and select the safest choices i440fz and SeaBIOS
- Minimum: 1 vCPU, 2G RAM, 16 GB disk
- Reasonable: 2 vCPU, 2 G RAM, 40 GB disk
- Recommended: 2-4 vCPU, 2-4 GB RAM, 40-120 GB disk
- 3 vNIC
- WAN, bridge to our main LAN
- LANnet (SDN)
- DMZ (SDN)
Proxmox uses mostly the MiB/GiB and not MB/GB, but only mostly
Installation
By default, we can log into the shell using the user installer with the password opnsense to install OPNsense or root for a dry run in the live environment.
- Set up the 1-3 NIC (
vtnet0 - vtnet2). - Select your keyboard
- Install as ZFS
- Hit
Change the Root Password - Hit
Complete the Install
Read carefully the instructions on the screen, it's tricky at times
Now, your firewall is installed. From the console:
- 2 - Set the IP addresses
- 12 - Update
- 7 - Test with ping
Final installation is done by using the Management VM and a browser.
Final Setup
Now we have all the parts needed for our lab.
The First Task
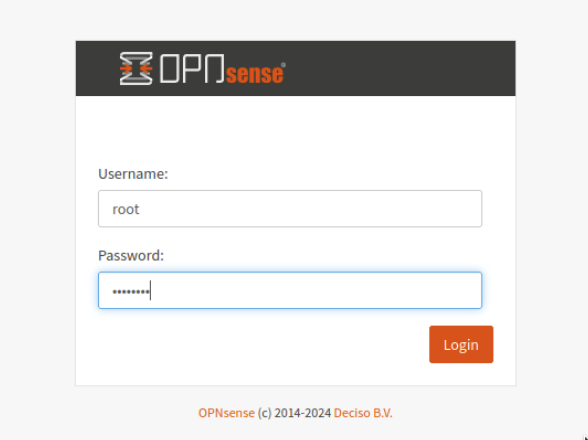
Setup OPNsense using the Management VM.
Log in to OPNsense and set it up. Use the wizard to do the setup for the first time. We will change the firewall a lot during the use of our lab, that is the nature of it.
If you didn't change it: login: root password: opnsense
Settings
- General information
- Hostname: e.x.;
FWlab - Domain:
lab.example.comuse your domain orpve-lab.local - DNS: depending on your network, 1.1.1.1 or 8.8.8.8 are generic
- Unbound DNS: configuration according to your network
- Timeserver and Timezone: according to your network and location, Etc/UTC is best for multinational cooperation
- WAN Interface setup: you can't block RFC1918, our WAN is the family LAN
- LAN IP: was set up in the local shell
- Root Password: a long, strong and complicated password is needed
- Hostname: e.x.;
- Reload
The Firewall
We shall configure our LAN and DMZ according to the needs of our Lab Networks.
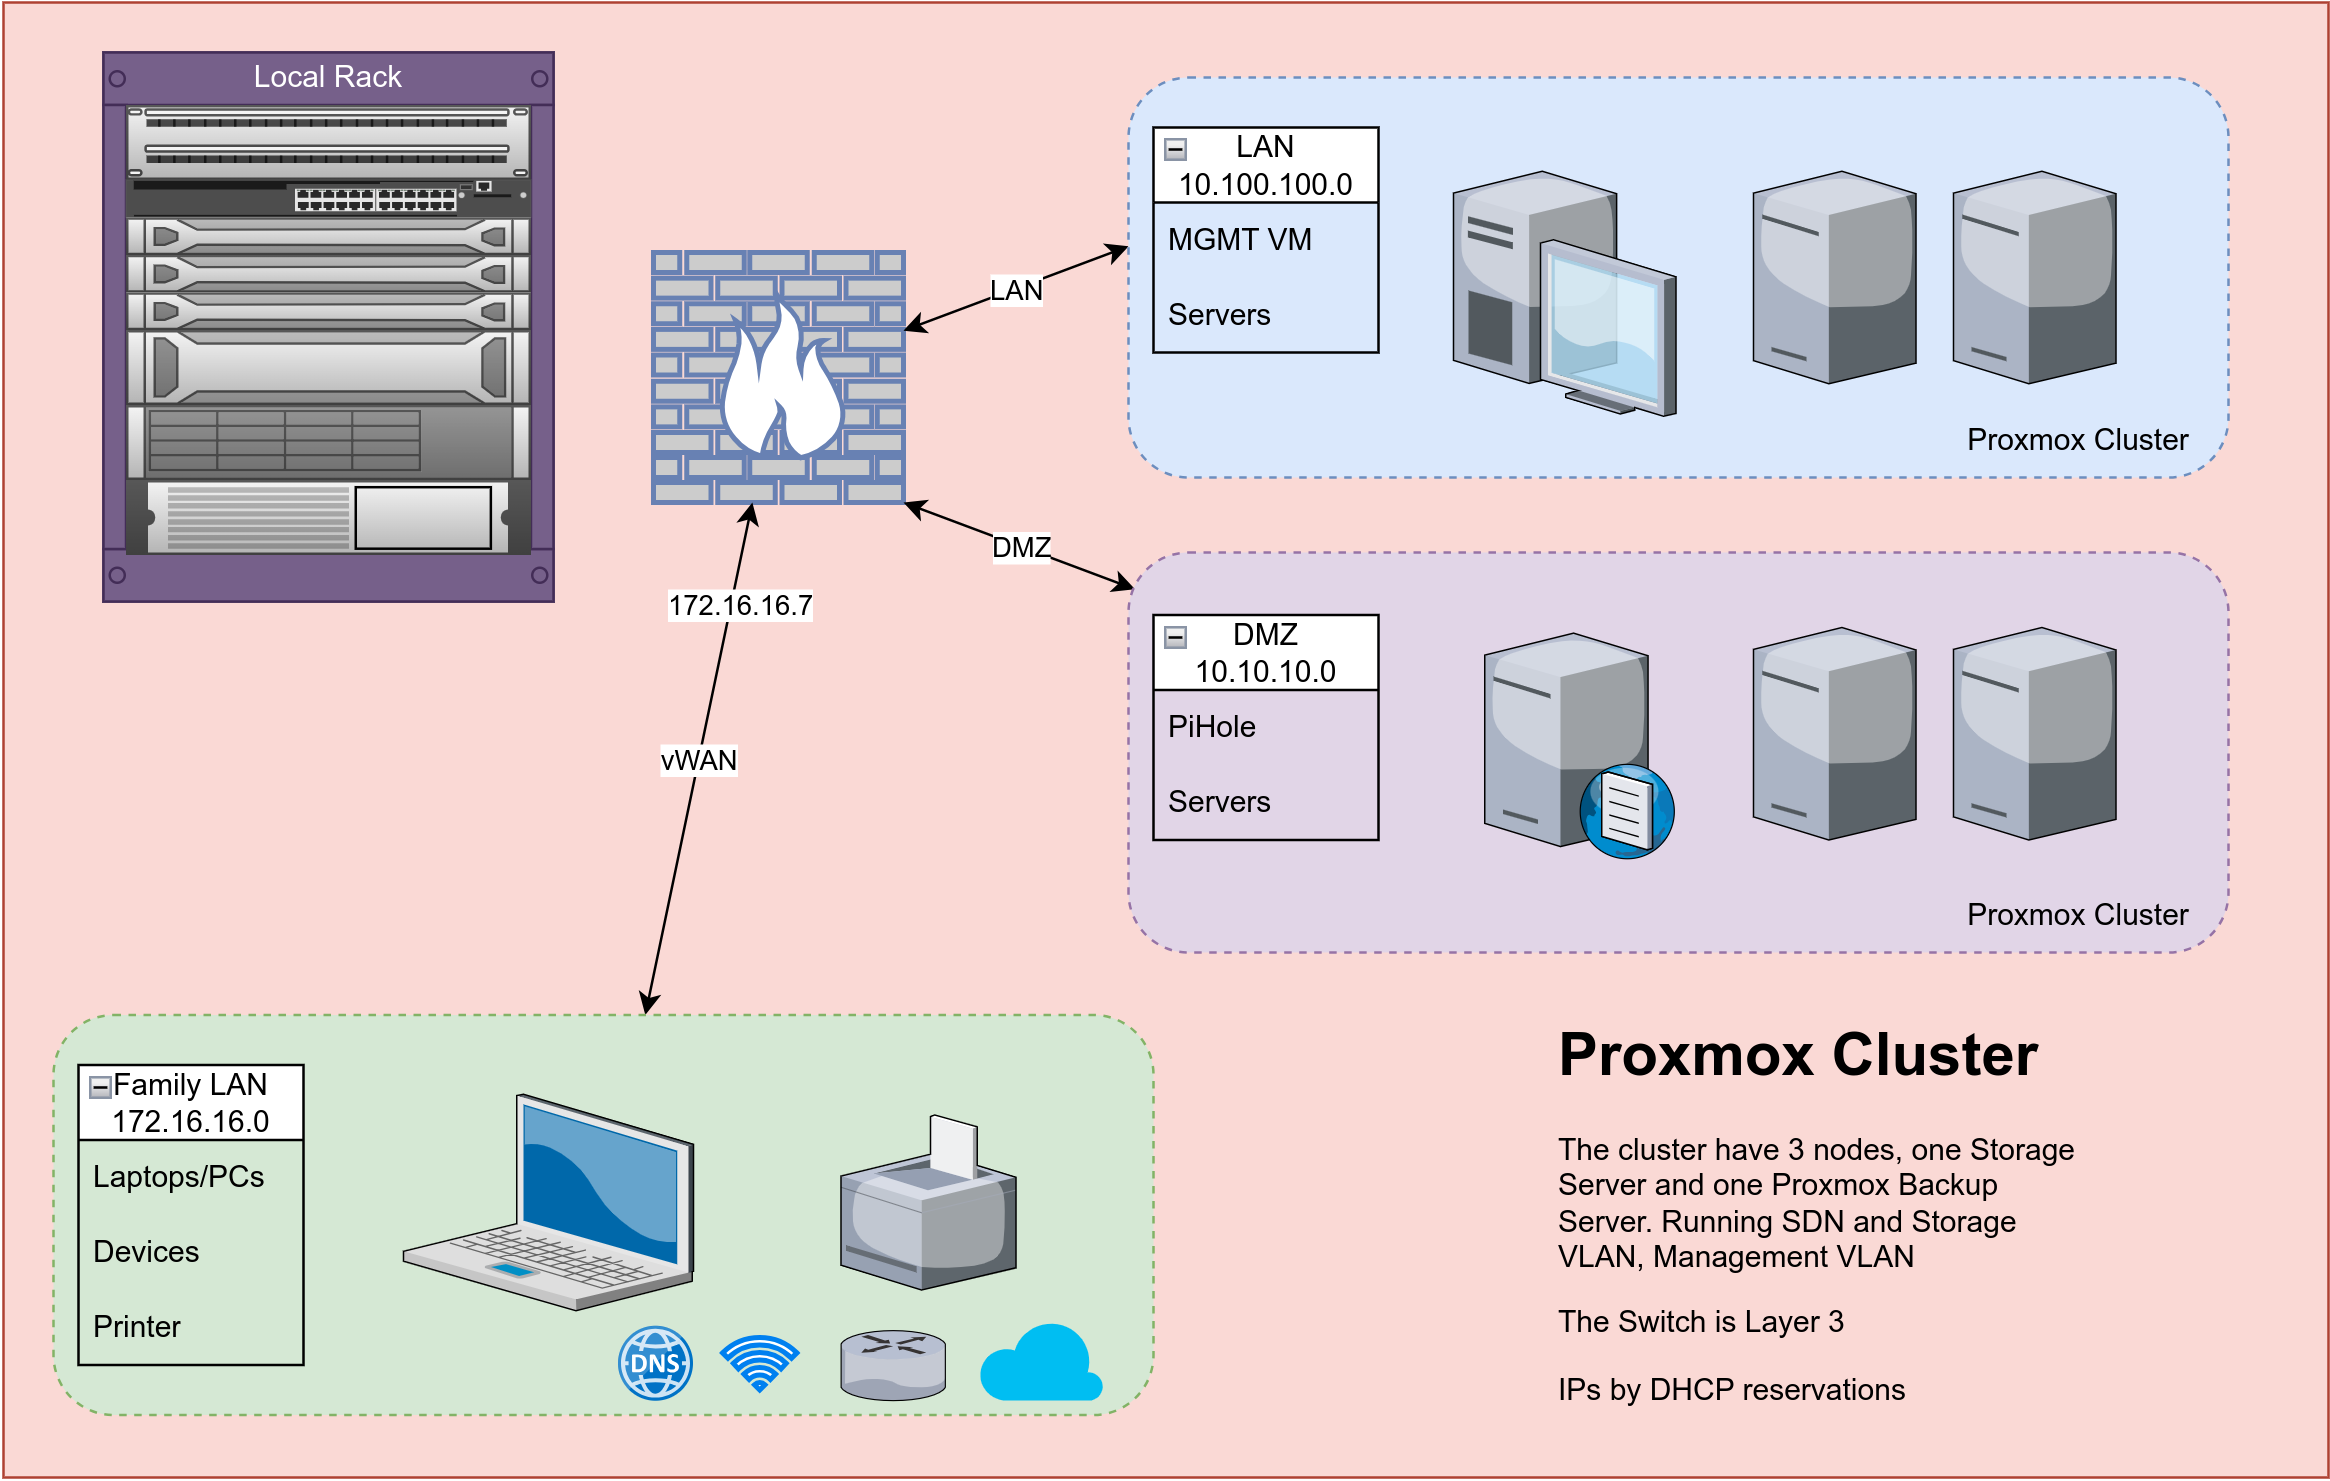
LAN
Includes all we need as a family. We also have a Guest and IoT Network. There are several router and firewall combos dealing with the networking.
DMZ
Using a DMZ allows setting different firewall rules for external facing and internal servers. This also allows me to control the traffic between the DMZ and LAN, which provides a greater level of protection for the internal network.
There are ways of setting up a DMZ. One way is to have two separate firewalls, one attached to the WAN, and one attached to the LAN. Between the two firewalls is the DMZ. OPNsense is configured to allow traffic egress to specific networks for LAN and DMZ and default deny all and forward to single DMZ server.
While configuring the DMZ, we also added rules necessary for web traffic and the ability to ping between the LAN and DMZ.
- TCP port 80 (HTTP) from DMZ to all
- TCP port 443 (HTTPS) from DMZ to all
- ICMP any from LAN to DMZ
- ICMP echo reply from DMZ to LAN
DNS
As OPNsense includes several ways to have DNS, DHCP servers, Reverse Proxy, HA, and ways of blocking bad sites, we could be happy as it is.
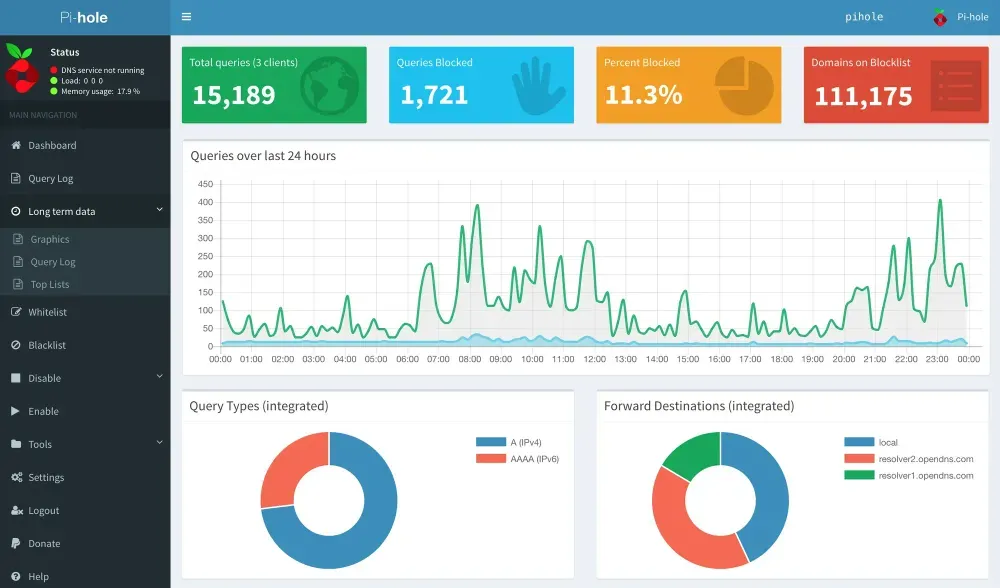
But, another easy way to create a DNS for all the zones, the Family, LAN and DMZ, would be to use Pi-hole. I love the easy interface of Pi-hole.
The alternative DNS – Pi-hole
Create a CT/LXC for running Pi-hole. Pi-hole is a software that blocks ads and trackers on your entire network by using DNS. Learn how to install, configure, and use Pi-hole as your DNS server, and access its Web interface for statistics and settings. Pi-hole is a DNS sinkhole.
- Disk: 8GB
- CPU cores: 1
- Memory: 512MB / Swap: 512MB
- Network: Bridge for Family / DMZ for DMZ server
- Static IP: follows network diagram
- DNS: use host settings for Family and Family DNS server IP for DMZ
Install Pi-hole
The first step is always to update, upgrade, and install dependencies. For Pi-hole, we only need curl to run the command in Pi-hole’s official installation guide.
apt update && apt upgrade -y && apt install curl -yThen we add a new user and lock down the CT.
Copy the MAC of the NIC, and go to your DHCP and make an IP Reservation,
or you can use a static IP on the CT, check your DHCP for a free address.
After that, we need to reboot, and then run the installation command.
curl -sSL https://install.pi-hole.net | bashAlternatively, you can use docker, link.
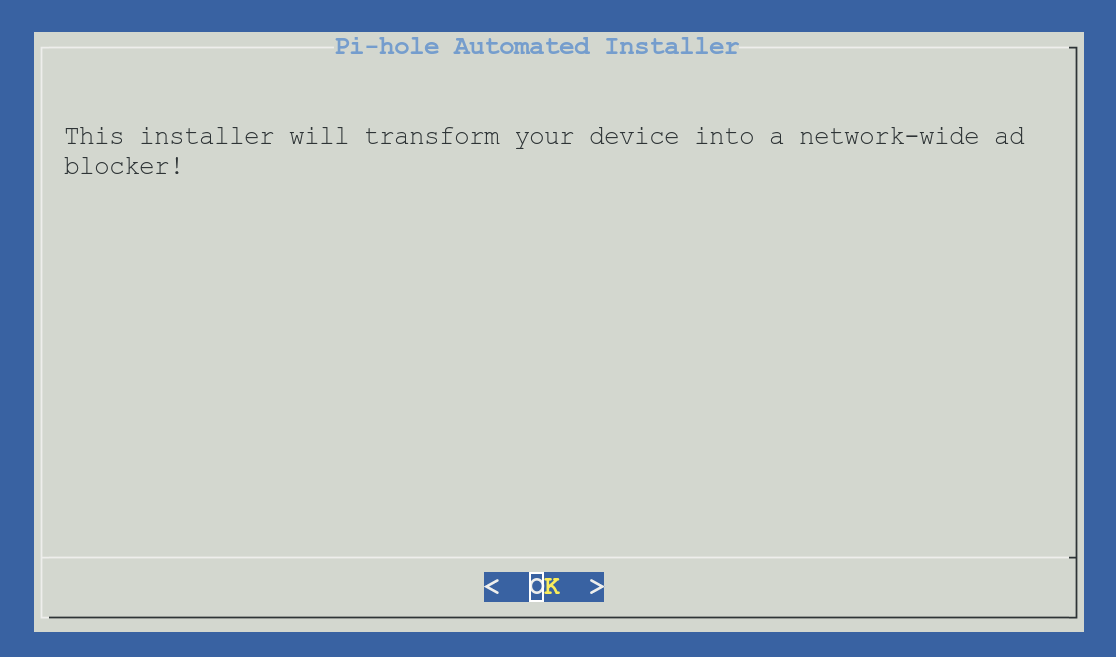
Select your options and let the script run. Download the Steven Black's list.
❗The last screen, Installation Complete, has some important information.
Read it carefully. Do copy your password, you'll need it for the second stage.
Now, login and setup as you like, do change the password.
Set a new password pihole -a -p
The upgrade process
- Important: Read the release notes.
Sometimes you will need to make changes other than just updating the image - Updating is as simple as running the following command:
pihole -up - If you are using Docker
- Pull the new image
- Stop and remove the running Pi-hole container
- If you care about your data (logs/customizations), make sure you have it volume-mapped, or it will be deleted in this step.
- Recreate the container using the new image
Firewall and DHCP changes
Using the OPNsense firewall as the DHCP server, you need to change the DNS servers to the new Pi-hole IPs.
Pi-hole, being an advertising-aware DNS/Web server, makes use of :
dnsmasq- a lightweight DNS and DHCP servercurl- A command-line tool for transferring data with URL syntaxlighttpd- web server designed and optimized for high performancephp- a popular general-purpose web scripting language- Admin LTE Dashboard - premium admin control panel based on Bootstrap 3.x
sqlite3- SQL Database engine
References
OPNsense [1] [2] [3] [4] [5] pfSense [6] SDN [7] [8] [9] Pi-hole [10] [11] [12]
OPNsense is a free and open source firewall and security platform that offers features such as VPN, intrusion detection, web filtering, and more. It has a user-friendly interface, supports IPv4 and IPv6, and offers commercial and community editions.OPNsense is based on pfSense and BSD. homepage ↩︎
OPNsense Documentation ↩︎
Proxmox SDN Documentation ↩︎
The Pi-hole is a DNS sinkhole that protects your devices from unwanted content, without installing any client-side software. Homepage, and Documentation ↩︎
Older post Pi-hole + Unbound DNS + PiVPN ↩︎
Older post A redundant DNS - Pi-Stack ↩︎


