cloud-init VM's
Cloud-init is the industry standard multi-distribution method for cross-platform cloud instance initialization. It is supported across all major public cloud providers, provisioning systems for private cloud infrastructure, and bare-metal installations.

Cloud-init is the industry standard multi-distribution method for cross-platform cloud instance initialization. It is supported across all major public cloud providers, provisioning systems for private cloud infrastructure, and bare-metal installations. A fantastic way of provisioning VM's is to use the Cloud-Init as iI do in most of my scripts like TemplateBuilder.sh. Cloud images are operating system templates and every instance starts out as an identical clone of every other instance. It is the user data that gives every cloud instance its personality and cloud-init is the tool that applies user data to your instances automatically.
Works with many popular operating systems
While cloud-init started life in Ubuntu, it is now available for most major Linux and FreeBSD operating systems. For cloud image providers, then cloud-init handles many of the differences between cloud vendors automatically — for example, the official Ubuntu cloud images are identical across all public and private clouds.
Storing Images
You can store the image any place you like but my recommendation is to store them with your ISO's. They are not ISO's but qcow2 files whit a img designator for ease of use. I prefer to use them as qcow2 files so I can take snapshots but feel free to use them as raw.
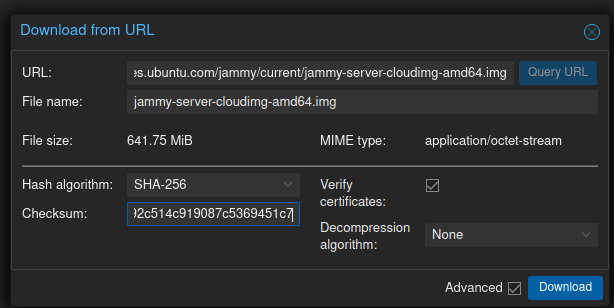
Downloading is as any ISO
Download a QCow2 UEFI/GPT Bootable disk image
- disk image - 642M
https://cloud-images.ubuntu.com/jammy/current/jammy-server-cloudimg-amd64.img - SHA256SUMS are found here
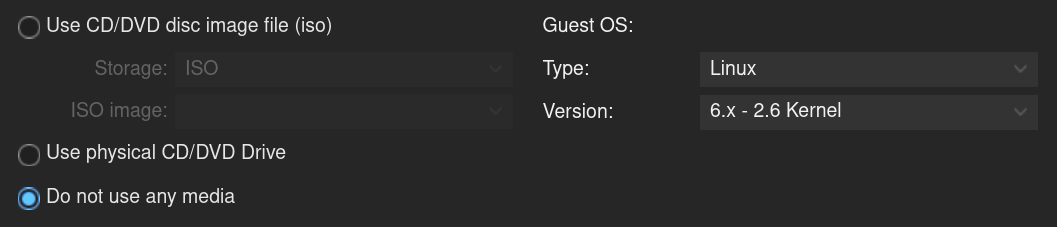
Using images
Using them is different from a ISO. You create a VM with no media and without a disk, delete it at creation. All the rest as a normal VM. Leave the Start after created blank.
Import the Disk
Let's assume we want a template
- 9000 (vmid) using the
- jammy-server-cloudimg-amd64-disk-kvm.img (source)
- tank (storage)
- and make it able for taking snapshots of it (options, QCow2) .
VM <vmid> from a cloud-image <source> file stored in <storage> and it's possible to take snapshots of it [OPTIONS].
- qm disk import <vmid> <source> <storage> [OPTIONS]
qm disk import 9000 /var/lib/vz/template/iso/jammy-server-cloudimg-amd64.img tank --format qcow2.
qm disk import 9000 /upool/ISO/template/iso/jammy-server-cloudimg-amd64-disk-kvm.img tank --format qcow2
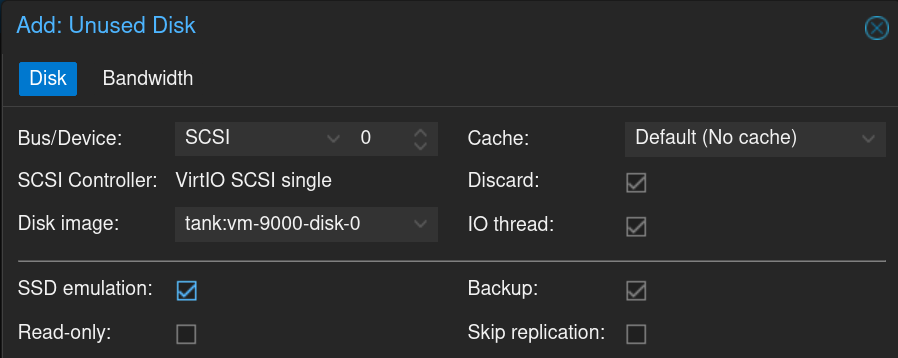
Add and Resize the Disk
Do not Start after created the VM - yet. We have 2 more steps to do (or one)
- Dubble-klick the Unused Disk 0
- qm disk resize <vmid> <disk> <size> [OPTIONS]
qm disk resize 9000 scsi0 4G
- 2252 MiB is often to small for actual workers
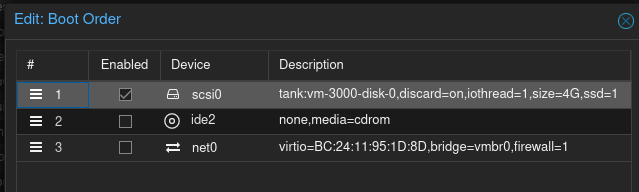
Change the Boot Order
Create a Template - Optional
- Create a Template to use for future VM's (if needed)
- qm template <vmid> [OPTIONS]
Create and edit the Cloud-Init disk
In Hardware - Add choose CloudInit Drive and the Storage for it. IDE is fine and lets use local-zfs for it.
Go to Cloud-Init and set User, Password, and SSH public key.
Set IP to DHCP for any Template, makes it possible for cloned VM's to find a IP.
References
Cloud-Init [1] Template Builder [2]
Intro to Cloud-Init page, Documentation page, cloud-init main page
Get pakages for your preferred distro
ArchLinux, CentOS, Debian, Fedora, freeBSD, Gentoo, openSUSE, RedHat, RockyLinux, Ubuntu. ↩︎TemplateBuilder posts and downloadabels resent post, older post, oldest post getting the scripts GitHub ↩︎


