Upgrade of PVE 8 to 9
It starts to be that time again. Debian Trixie was released and as Proxmox follows Debian lead we can now upgrade PVE 8 → PVE 9 and PBS 3 → PBS 4


Proxmox VE 9.x introduces several new major features. You should plan the upgrade carefully, make and verify backups before beginning, and test extensively. Depending on the existing configuration, several manual steps—including some downtime — may be required. PBS upgrade, link
In case the system is customized and/or uses additional packages or any other third party repositories/packages, ensure those packages are also upgraded to and compatible with Debian Trixie. Things like the microcode libraries and NIC drivers
In general, there are two ways to upgrade a Proxmox VE system:
- A new installation on new hardware (restoring VMs from the backup)
- Create the cleanest system and is recommended for home labs
- An in-place upgrade via apt (step-by-step)
- Necessary for production, maybe. You should move your VMs and CTs to another node before upgrading.
Prerequisites and Notes
Hyper-converged Ceph
- Upgrade any Ceph Quincy or Ceph Reef cluster to Ceph 19.2 Squid before you start the Proxmox VE upgrade to 9.x.
Follow the guide, Ceph Quincy to Reef and Ceph Reef to Squid, respectively.
A PVE + PBS system
Also called a "Frankenstein system" or a "co-installed Proxmox Backup Server".
You need to see the PVE and the PBS upgrade wiki page!
You can upgrade both in one go, by syncing the steps in which the APT repositories are changed.
Rules of Migrating a VM/CT
Migration compatibility rules to keep in mind when planning your cluster upgrade.
Migrating from an Older PVE → never
- A migration of a VM or CT will always work.
Migrating from a Never PVE → older
- A migration may work, but is generally not supported.
Run an important VM/CT
If any VMs and CTs need to keep running for the duration of the upgrade, migrate them away from the node that is being upgraded.
Communication
It's recommended to have access over a host independent channel like IKVM/IPMI or physical access.
If you only have SSH available, we recommend testing the upgrade on an identical, but non-production machine first.
It is also highly recommended to use a terminal multiplexer (for example, tmux) to ensure that the upgrade can continue even if/when the SSH connection gets interrupted.
Other issues
Cluster health
- A healthy cluster is mandatory!
Backups
- Valid and tested backup of all VMs and CTs (in case something goes wrong)
Disk space
- At the root mount point, you need some free space: test by
df -h /- For PVE only: more or 10 GB or at least 5 GB
- For a PVE+PBS system: at least 10 GB free disk space
Customized system
In case the system is customized and/or uses additional packages or any other third party repositories/packages, ensure those packages are also upgraded to and compatible with Debian Trixie.
Planing the upgrade
The essential of success is to plan the upgrade from PVE 8 → 9, and to plan it well. This will include testing of the methods and evaluation of the compatibility of systems and software in general.
Lack of planning is the path to disaster and frustration 👿
Make and verify backups before beginning, and test extensively.
Steps
- Planning
- Make backups
- Testing
- Evaluate
- Upgrade
- Test
Upgrading your systems
There are two ways to upgrade a Proxmox VE 8.x system to Proxmox VE 9.x:
- 1 - A new installation on new hardware (restoring VMs from the backup)
- 2 - An in-place upgrade via apt (step-by-step)
1 –The New Installation -method
- Backup all VMs and containers to an external storage.
- You can use the normal:
- PBS, a NAS or any computer using NFS or CIFS or
- a USB disk (link to my post):
- Plugin a USB disk and create a directory: backup (or something)
- Add it to the Datacenter as USB (or something)
- You can use the normal:
- Backup all files in /etc
- The Proxmox required files are located in:
-
/etc/pve,/etc/passwd,/etc/network/interfaces,/etc/resolv.conf, - and anything that deviates from a default installation.
# The USB disk is /mnt/pve/backup1
cp -r /etc/pve/ /mnt/pve/backup1/pve1etc/
cp -r /etc/passwd/ /mnt/pve/backup1/pve1etc/
cp -r /etc/network/interfaces/ /mnt/pve/backup1/pve1etc/network/
cp -r /etc/resolv.conf /mnt/pve/backup1/pve1etc/
As this
- Install latest Proxmox VE 9.x from the ISO, your system disk will be erased.
- Other discs may or may not be affected.
- ZFS pools should be exported and then imported after the upgrade
- Empty the browser cache and/or force-reload the Web UI.
- macOS:
⌘ + Alt + R - Linux/Windows:
CTRL + SHIFT + R
- macOS:
- Rebuild your cluster. Optional – For clustered nodes
- Restore the file
/etc/pve/storage.cfg- this will make the external storage used for backup available
- Restore firewall configs – Optional, use if your system uses the PVE FW
-
/etc/pve/firewall/and/etc/pve/nodes/<node>/host.fw.
-
- Restore all your VMs from backups
Expert mode
If you are comfortable with the CLI and all VMs/CTs are on a single shared storage, you can follow the procedure Bypassing backup and restore when upgrading.
2 – In-place upgrade
The use of apt – an Expert mode
In-place upgrades are carried out via apt. You need to be familiar with apt commands to be able to proceed with this upgrade method.
See the notes about PVE+PBS installation
Prerequisites
Upgrade the Node
Upgraded to the latest version of Proxmox VE 8.4.1 or newer on all nodes.
If your pve-manager version isn't at least 8.4.1 you need to ensure your node(s) have the correct package repository configuration (web UI, Node → Repositories)
Final test before continuing
- Run the included test script pve8to9
- Run the script
pve8to9andpve8to9 --full
- Run the script
If you see errors, you need to fix all the issues before it's safe to upgrade. You should re-run the test after any fix.
Update the configured APT repositories
First, make sure that the system is using the latest Proxmox VE 8.4 packages
apt update && apt dist-upgrade -y && pveversionThe last command should report at least 8.4.1 or newer.
Ensure that you are running Ceph Squid (version 19).
Check the output of
ceph --version to be sure. ⚠️If you are not running Ceph Squid:
- See the upgrade guide and complete the upgrade first.
- Do not proceed with any of the steps below.
- Upgrade to Ceph Squid.
Update Debian Base Repositories to Trixie
Update all Debian and Proxmox VE repository entries to Trixie.
sed -i 's/bookworm/trixie/g' /etc/apt/sources.list
sed -i 's/bookworm/trixie/g' /etc/apt/sources.list.d/pve-enterprise.list
Ensure that there are no remaining Debian Bookworm specific repositories left, otherwise you can put a # symbol at the start of the respective line to comment these repositories out.
Check all entries in the /etc/apt/sources.list and /etc/apt/sources.list.d/pve-enterprise.list, for the correct Proxmox VE 9 / Debian Trixie repositories, see Package Repositories.
All entries must be Trixie, no Bookworm entries shall be left!
Add the Proxmox VE 9 Package Repository
Having an Enterprise license
cat > /etc/apt/sources.list.d/pve-enterprise.sources << EOF
Types: deb
URIs: https://enterprise.proxmox.com/debian/pve
Suites: trixie
Components: pve-enterprise
Signed-By: /usr/share/keyrings/proxmox-archive-keyring.gpg
EOF
After you added the new repository, check that apt picks it up correctly.
You can do so by first running apt update followed by apt policy.
Make sure that no errors are shown and that apt policy only outputs the desired repositories.
Then you can remove the old /etc/apt/sources.list.d/pve-enterprise.list file. Re-run apt update and apt policy to be certain that the old repo has been removed.
No-subscription
cat > /etc/apt/sources.list.d/proxmox.sources << EOF
Types: deb
URIs: http://download.proxmox.com/debian/pve
Suites: trixie
Components: pve-no-subscription
Signed-By: /usr/share/keyrings/proxmox-archive-keyring.gpg
EOF
After you added the new repository, check that apt picks it up correctly.
- Test with:
apt updatefollowed byapt policyorapt update && apt policy
Make sure that no errors are shown and that apt policy only outputs the desired repositories.
Then remove the previous Proxmox VE 8 no-subscription repository from either the /etc/apt/sources.list, /etc/apt/sources-list.d/pve-install-repo.list or any other .list file you may have added it to. Run apt update and apt policy again to be certain that the old repositories have been removed.
Update the Ceph Package Repository
Having an Enterprise license
cat > /etc/apt/sources.list.d/ceph.sources << EOF
Types: deb
URIs: https://enterprise.proxmox.com/debian/ceph-squid
Suites: trixie
Components: enterprise
Signed-By: /usr/share/keyrings/proxmox-archive-keyring.gpg
EOF
No-subscription
cat > /etc/apt/sources.list.d/ceph.sources << EOF
Types: deb
URIs: http://download.proxmox.com/debian/ceph-squid
Suites: trixie
Components: no-subscription
Signed-By: /usr/share/keyrings/proxmox-archive-keyring.gpg
EOF
Refresh Package Index
Update the repositories' package index and verify that no error is reported:
apt updateUpgrade the system to Debian Trixie and Proxmox VE 9.0
Note that the time required for finishing this step heavily depends on the system's performance, especially the root file system's IOPS and bandwidth.
A slow spinner can take up to 60 minutes or more, while for a high-performance server with SSD storage, the dist-upgrade can be finished in under 5 minutes.
Start with this step, to get the initial set of upgraded packages:
apt dist-upgradeCommon configuration files with changes, and the recommended choices are:
/etc/issue→ use the default N for No- The file will be auto-generate on boot, and it has only cosmetic effects on the login console. Using the default "No" (keep your currently-installed version) is safe here. It's the welcome screen.
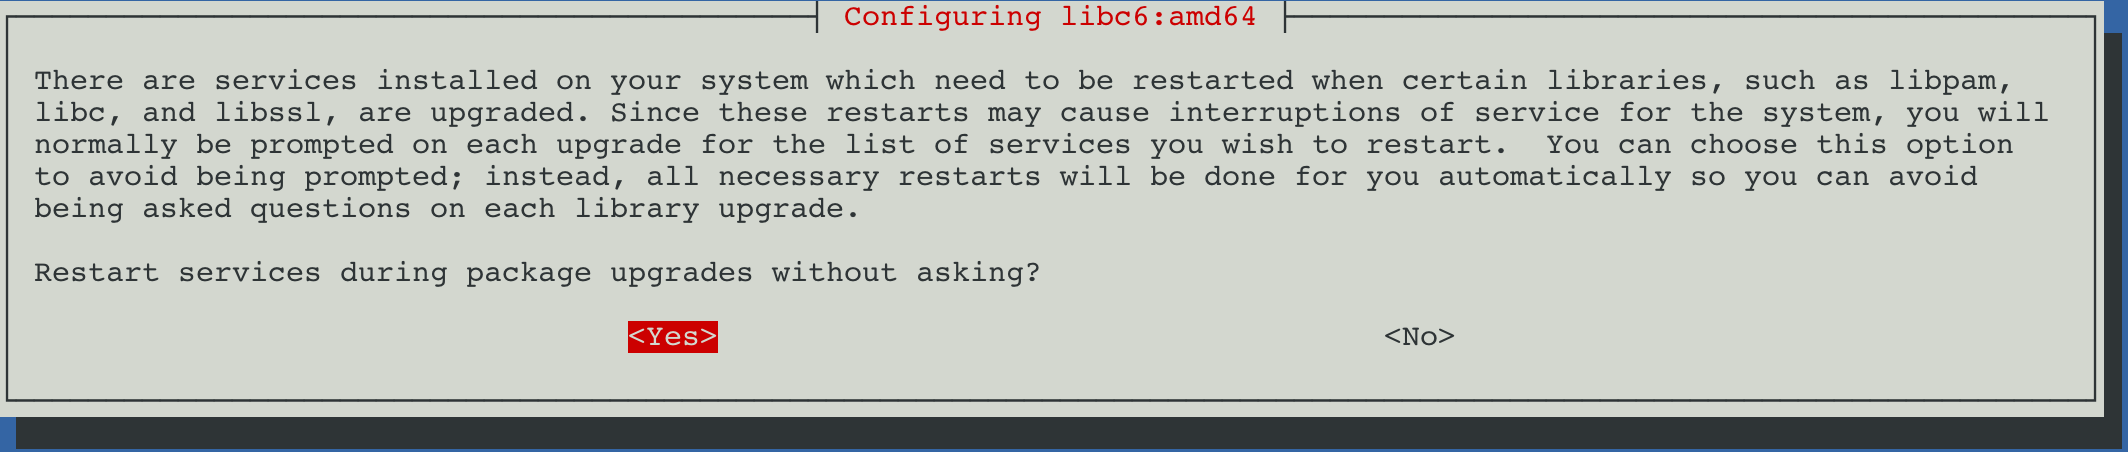
- The auto restart, I recommend Yes
/etc/lvm/lvm.conf→ use the default Y for Yes- Changes relevant for Proxmox VE will be updated, and a newer config version might be useful. If you did not make extra changes yourself and are unsure, it's suggested to choose "Yes" (install the package maintainer's version) here.
/etc/ssh/sshd_config→ use any
If you have not changed this file manually, the only differences should be a replacement ofChallengeResponseAuthentication nowithKbdInteractiveAuthentication noand some irrelevant changes in comments (lines starting with#). If this is the case, both options are safe, though we would recommend installing the package maintainer's version in order to move away from the deprecatedChallengeResponseAuthenticationoption. If there are other changes, we suggest inspecting them closely and decide accordingly./etc/default/grub→ Be careful, usually No- Here you may want to take special care, as this is normally only asked for if you changed it manually, e.g., for adding some kernel command line option. It's recommended to check the difference for any relevant change, note that changes in comments (lines starting with
#) are not relevant.
If unsure, we suggested to selected "No" (keep your currently-installed version)
- Here you may want to take special care, as this is normally only asked for if you changed it manually, e.g., for adding some kernel command line option. It's recommended to check the difference for any relevant change, note that changes in comments (lines starting with
/etc/chrony/chrony.conf→ depends, usually Y for Yes- If you made local changes you might want to move them out of the global config into the
conf.dor, for custom time sources, thesources.dfolder. See the/etc/chrony/conf.d/READMEand/etc/chrony/sources.d/READMEfiles on your system for details. If you did not make extra changes yourself and are unsure, it's suggested to choose "Yes" (install the package maintainer's version) here.
- If you made local changes you might want to move them out of the global config into the
Check Result
If the dist-upgrade command exits successfully, you can re-check the pve8to9 checker script and reboot the system in order to use the new PVE kernel.
WARN: a suitable kernel (proxmox-kernel-6.14) is installed, but an unsuitable (6.8.12-13-pve) is booted, missing reboot?!Finalizing an Upgrade
Reboot into the new Kernel
You should reboot now, even if you already used the 6.14 kernel.
This is required to guarantee compatibility with the rest of the system, the updated kernel was build with the newer PVE 9 compiler and ABI versions.
systemctl rebootThe first boot into Proxmox 9 may take a bit longer.
After the Upgrade
Empty the browser cache and/or force-reload the Web UI
- macOS:
⌘ + Alt + R(alt/option ⎇) - Linux/Windows:
CTRL + SHIFT + R
Test that everything is working
Optional
Modernize apt Repository Sources
You can migrate existing repository sources to the recommended deb822 style format, by running: apt modernize-sources.
The command will also keep the old.listfiles around by appending.bakto them. So you will have the new.sourcesfiles and the old repository configurations in the.list.bakfiles.
You can remove the leftover backup files once you verified that everything works smoothly with the new format.
Clusters
- Check that all nodes are up and running on the latest package versions.
- Update all nodes to the latest version of Proxmox 8
- Proxmox VE 9 deprecates HA groups in favor of HA rules.
If you are using HA and HA groups, HA groups will be automatically migrated to HA rules once all cluster nodes have been upgraded to Proxmox VE 9.
If you encounter any issues with HA groups or rules after having upgraded all cluster nodes, check the logs ofpve-ha-crmon the active CRM node for errors withjournalctl -eu pve-ha-crm.
New Network feature
Network Interface Name Change
Due to the new kernel recognizing more features of some hardware, like for example virtual functions, and interface naming often derives from the PCI(e) address, some NICs may change their name, in which case the network configuration needs to be adapted.
In general, it's recommended to either have an independent remote connection to the Proxmox Backup Server's host console, for example, through IPMI or iKVM, or physical access for managing the server even when its own network doesn't come up after a major upgrade or network change.
The latest version of Proxmox Backup Server 3.4 and 4.0 provide a package called proxmox-network-interface-pinning that you can install. This package offers a CLI tool that helps you pin all network interfaces to NIC-based names and update the network configuration simultaneously.
Usage
USAGE: pve-network-interface-pinning <COMMAND> [ARGS] [OPTIONS]

       pve-network-interface-pinning generate  [OPTIONS]

       pve-network-interface-pinning help [<extra-args>] [OPTIONS]
Issue the command pve-network-interface-pinning generate to rename all your ethenet ports to stabel nic1, nic2
root@pve-1:~# proxmox-network-interface-pinning generate
This will generate name pinning configuration for all interfaces - continue (y/N)?
y
Name for link 'enp0s18' will change to 'nic0'
Name for link 'enp0s19' will change to 'nic1'
Name for link 'enp0s20' will change to 'nic2'
Name for link 'enp0s21' will change to 'nic3'
Name for link 'enp0s22' will change to 'nic4'
Generating link files
Successfully generated .link files in '/usr/local/lib/systemd/network/'
Updating /etc/pve/nodes/pve-1/...
Updating /etc/network/interfaces.new
Updating /etc/pve/sdn/controllers.cfg
Updating /etc/pve/sdn/fabrics.cfg
Successfully updated Proxmox VE configuration files.

Please reboot to apply the changes to your configuration
Created files
They are stored in /usr/local/lib/systemd/network as link files with name 50-pve-<pnined_name>.link
Updated files
/etc/pve/nodes/pve-1/.../etc/network/interfaces.new/etc/pve/sdn/con
Potential Issues
See the Proxmox wiki page from References below
General
As a Debian based distribution, Proxmox Backup Server is affected by most issues and changes affecting Debian. Thus, ensure that you read the upgrade specific issues for Debian Trixie.
Please also check the known issue list from the Proxmox Backup Server 4.0 changelog: https://pbs.proxmox.com/wiki/index.php/Roadmap#4.0-known-issues
Older Hardware and New 6.14 Kernel
Compatibility of old hardware (10 years or older) isn't as thoroughly tested as more recent hardware. For old hardware it's to test for compatibility on identical or at least similar hardware before upgrading any production machines.
Check the official forums and web-pages for more info.
Systemd-boot meta-packege
Systemd-boot meta-package changes the bootloader configuration automatically and should be uninstalled
See the Proxmox wiki page from References below
LVM Thin Pool needs repair
On some systems, LVM Thin Pools might need to be manually repaired after the upgrade and you will see an error message like:
VM Live-Migration with different host CPUs
Live migration between nodes with different CPU models and especially different vendors can cause problems, such as VMs becoming unresponsive and causing high CPU utilization.
We recommend testing live migration with a non-production VM first when upgrading. For this reason, we highly encourage using homogenous setups in clusters that use live migration.
cgroup V1 Removal
Please note that since Proxmox VE 7.0, the default environment is pure cgroupv2. While it was still possible to manually enable the legacy cgroupv1 environment with Proxmox VE 8, this is no longer possible with Proxmox VE 9, which does not support the legacy cgroupv1 environment.
This means Containers running systemd version 230 (released in 2016!) or older will not be supported by Proxmox VE 9. If you still run such container (e.g., CentOS 7 or Ubuntu 16.04), please use the remaining Proxmox VE 8 support cycle (estimated EOL is July 2026) as time window to migrate to newer, still supported versions of the respective Container OS.
NVIDIA vGPU Compatibility
If you are using NVIDIA's GRID/vGPU technology, its driver must be compatible with the kernel you are using. Make sure you use at least GRID version 18.3 (driver version 570.158.02 - current as of July 2025) on the host before upgrading, since older versions (e.g. 15.x) are not compatible with kernel versions >= 6.0 and Proxmox VE 9.0 ships with at least 6.14.
Note that we cannot guarantee compatibility during the beta, for the definitive list of tested versions see: https://pve.proxmox.com/wiki/NVIDIA_vGPU_on_Proxmox_VE
VM Memory Consumption Shown is Higher
In some situations you might see that the Memory usage of a VM is higher after the upgrade. Maybe even a bit over 100%.
If the VM does not report detailed memory usage, Proxmox VE will show the host's view of the memory usage. With Proxmox VE 9, the accounting of the memory usage on the host has been adapted and takes the memory overhead of the VM into account. Therefore, the percentage may spike to over 100% in some cases.
If the new Host memory usage field is the same as the Memory Usage field in the VM's summary panel, then Proxmox VE was unable to gather the VM's internal memory usage information.
This happens if one of the following conditions applies:
- The
Ballooning Devicehas been disabled in the advanced memory settings of the VM.This removes the communication channel to gather the guest's internal memory usage information. - The guest does not report back any detailed memory usage information.
- For example, FreeBSD is known to not report memory usage details, which includes popular firewalls like pfSense or OPNsense.
- If the
BalloonServiceon a Windows guest is not installed or not running.
Veeam Backup
Veeam Backup is broken for VMs using QEMU machine version >= 10.0
In preparation for features like snapshots on thick LVM, it was necessary to change how Proxmox VE attaches disks to QEMU internally. This is in effect for virtual machines using a QEMU machine version 10.0 or higher. Veeam has not adapted to these changes yet. Either pin the machine version to 9.2+pve1 for the affected virtual machines or postpone the upgrade.
Host PCI passthrough
Host PCI passthrough with kernel 6.14 for virtual machines is sometimes broken
Some users reported that virtual machines using PCI passthrough are not able to start anymore when using kernel 6.14.
A workaround
- Booting an older kernel.
- Pin the old kernel to make this persistent.
References
Breaking changes and Issues [1] Proxmox wiki [2] Prerequsites [3] USB Backups [4] NIC pinning [5]


