Upgrade of PBS 3 to PBS 4
It starts to be that time again. Debian Trixie was released and as Proxmox follows Debian lead we can now upgrade our Proxmox Backup Server from version 3 → version 4


Proxmox Backup Server 4 is based on Debian 13 Trixie, a new major release, and introduces several new major features and changes. You should plan the upgrade carefully, make and verify backups before beginning, and test extensively. Depending on the existing configuration, several manual steps — including some downtime — may be required.
A PVE + PBS system
Also called a "Frankenstein system" or a "co-installed Proxmox Backup Server".
You need to see the PVE and the PBS upgrade wiki page!
You can upgrade both in one go, by syncing the steps in which the APT repositories are changed for new ones.
For systems with Proxmox VE and Proxmox Backup Server installed together, you should also read the Proxmox VE upgrade from 8 to 9 how-to carefully.
Communication
It's necesary to have reliable acces to the node during the whole upgrade process.
- It's recommended to have access over a host independent channel like IKVM/IPMI or physical access.
- If you only have a SSH connection available.
It's recommend testing the upgrade on an identical, but non-production machine first.- It is also highly recommended to use a terminal multiplexer (for example, tmux) to ensure that the upgrade can continue even if/when the SSH connection gets interrupted.
Disk space
At the root mount point, you need some free disk space, more than 10 GB disk space.
Planing the upgrade
The essential of success is to plan the upgrade from PBS 3 → 4, and to plan it well. This will include testing of the methods and evaluation of the compatibility of systems and software in general.
Lack of planning is the path to disaster and frustration 👿
Make and verify backups before beginning, and test extensively.
Steps
- Planning
- Make backups
- Testing
- Evaluate
- Stop the system
- Upgrade
- Test
In-place Upgrade
It's an Expert mode using apt.
In-place upgrades are carried out via apt. You need to be familiar with apt commands to be able to proceed with this upgrade method.
Prerequisites
Perform the upgrade actions via a reliable acces to your node
- a remote management (like iKVM or IPMI)
- SSH, a physical console.
Upgrad to latest version
- Upgraded to the latest version of Proxmox Backup Server 3.4, see the roadmap for potential important changes in the stable release. Use
apt updateandapt dist-upgradeusing the Bookworm repository setup to upgrade to latest 3.4. - Update the Configured APT Repositories by first, make sure that the system is using the latest Proxmox Backup Server 3.4 packages:
apt update && apt dist-upgrade && proxmox-backup-manager versions- The last command should report at least
3.4.2-1or newer. - Verify version: The command
proxmox-backup-manager versionsshould print:proxmox-backup-server 3.4.2-1 running version: 3.4.2(or higher) - If you do not get updates check correct package repository configuration.
Make a Backup
- Make a backup of
/etc/proxmox-backupto ensure that in the worst case, any relevant configuration can be recovered:tar czf "pbs3-etc-backup-$(date -I).tar.gz" -C "/etc" "proxmox-backup"
Free Disk Space
- At least 10 GB free disk space on the root mount point:
df -h /is needed
Final test before continuing
- Run the included test script pbs3to4
- Run the script
pbs3to4andpbs3to4 --full
- Run the script
If you see errors, you need to fix all the issues before it's safe to upgrade. You should re-run the test after any fix.
Start the Upgrade Process
Enabling the read-only maintenance mode on all datastores ensures that no new backup can be started during the upgrade, while keeping existing ones available to read. The read-only maintenance mode allows you to enforce a known and stable datastore state and reduces the I/O and general load of the Proxmox Backup Server during the upgrade, making that faster.
You can enable and disable the maintenance mode either via:
- the GUI -> Options tab of each datastore menu entry
- using the CLI over SSH or using the shell
Enable Maintenance Mode
Replace bpool with the actual name of your pool: tank, backuppool, backup ...
proxmox-backup-manager datastore update bpool --maintenance-mode read-onlyInstead of bpool use your actual pool name
Update Debian Base Repositories to Trixie
Update all repository entries to Trixie:
sed -i 's/bookworm/trixie/g' /etc/apt/sources.listEnsure that there are no remaining Debian Bookworm specific repositories left. You can place a # symbol at the start of the respective line to comment such a repository out, disabling it. Check all files in the /etc/apt/sources.list.d/ folder (like pbs-enterprise.list) and also the top-level /etc/apt/sources.list file. See Package Repositories section in the reference docs for the correct Proxmox Backup Server 4 / Debian Trixie repositories.
Upgrade to Debian Trixie
Update Debian Base Repositories to Trixie
Update all Debian and Proxmox VE repository entries to Trixie.
sed -i 's/bookworm/trixie/g' /etc/apt/sources.list
sed -i 's/bookworm/trixie/g' /etc/apt/sources.list.d/pve-enterprise.list
Ensure that there are no remaining Debian Bookworm specific repositories left, otherwise you can put a # symbol at the start of the respective line to comment these repositories out. Check all entries in the /etc/apt/sources.list and /etc/apt/sources.list.d/pve-enterprise.list, for the correct Proxmox VE 9 / Debian Trixie repositories see Package Repositories.
Change to the new deb822 -format
Update the repository to Trixie in the new deb822 -format with the following command.
Add the Proxmox Backup Server 4 Package Repository:
Using a Enterprise license
cat > /etc/apt/sources.list.d/pbs-enterprise.sources << EOF
Types: deb
URIs: https://enterprise.proxmox.com/debian/pbs
Suites: trixie
Components: pbs-enterprise
Signed-By: /usr/share/keyrings/proxmox-archive-keyring.gpg
EOF
No-subscription user
cat > /etc/apt/sources.list.d/proxmox.sources << EOF
Types: deb
URIs: http://download.proxmox.com/debian/pbs
Suites: trixie
Components: pbs-no-subscription
Signed-By: /usr/share/keyrings/proxmox-archive-keyring.gpg
EOF
Refresh Package Index
Update the repositories' package index and verify that no error is reported:
apt update && apt policyAfter you added the new repository as above, check that apt picks it up correctly.
Make sure that no errors are shown and that apt policy only outputs the desired repositories.
Upgrade the System to PBS 4
Note that the time required for finishing this step heavily depends on the system's performance, especially the root filesystem's IOPS and bandwidth. A slow spinner can take up to 60 minutes or more, while for a high-performance server with SSD storage, the dist-upgrade can be finished in less than 5 minutes.
pam realm)To get the initial set of upgraded packages, run:
apt update && apt dist-upgradeDuring the above step, you will be asked to approve changes to configuration files and some service restarts, where the default config has been updated by their respective package.
You may also be shown the output of apt-listchanges, you can simply exit there by pressing q.
Keyboard
If you get prompted for your default keyboard selection, simply use the arrow keys to navigate to the one applicable in your case and hit enter.
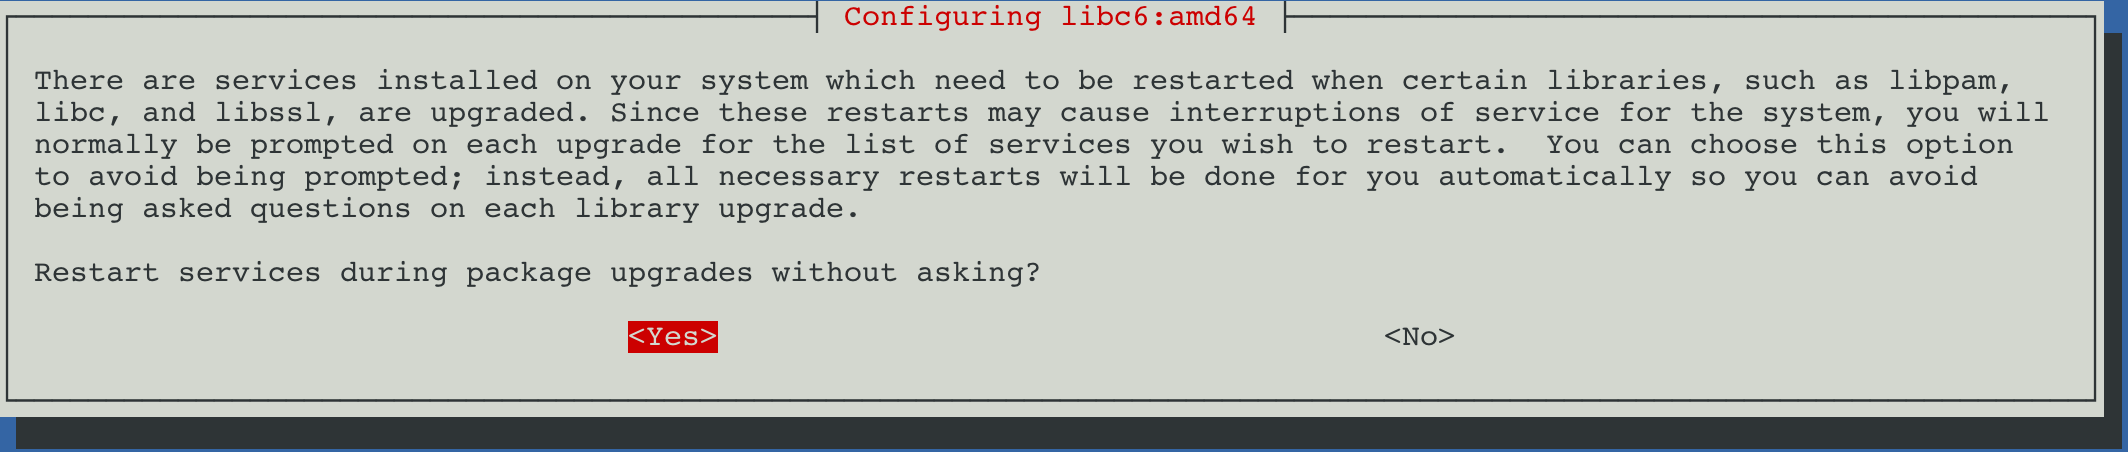
Restart Services
For questions about service restarts (like Restart services during package upgrades without asking?) use the default No if unsure, as the reboot after the upgrade will restart all services cleanly anyway.
The auto restart, I recommend Yes
For questions about (default) configuration changes, it's suggested to check the difference for each file in question and choose the answer accordingly to what's most appropriate for your setup.
Changes to config files
Common configuration files with changes, and the recommended choices are:
/etc/issue→ No
Proxmox Backup Server will auto-generate this file on boot, and it has only cosmetic effects on the login console.
Using the default "No" (keep your currently-installed version) is safe here.- Keyboard
- Choose your keyboard
- Re-start services → No, I usually say Yes

- Re-start these services → OK

/etc/ssh/sshd_config→ Yes
If you have not changed this file manually, the only differences should be a replacement ofChallengeResponseAuthentication nowithKbdInteractiveAuthentication noand some irrelevant changes in comments (lines starting with#).
If this is the case, both options are safe, though we would recommend installing the package maintainer's version in order to move away from the deprecatedChallengeResponseAuthenticationoption.
If there are other changes, we suggest inspecting them closely and decide accordingly./etc/default/grub→ Read the notes
Here you may want to take special care, as this is normally only asked for if you changed it manually, e.g., for adding some kernel command line option. It's recommended to check the difference for any relevant change, note that changes in comments (lines starting with#) are not relevant.
If unsure, we suggested to selected "No" (keep your currently-installed version)
Check the Result
If the dist-upgrade command exits successfully, you can re-check the pbs3to4 checker script and reboot the system in order to use the new PVE kernel.
pbs2to4WARN: a suitable kernel (proxmox-kernel-6.14) is installed, but an unsuitable (6.8.12-13-pve) is booted, missing reboot?!Cleanup of Repositories
Clean up of Enterprise
Remove the old /etc/apt/sources.list.d/pbs-enterprise.list.
Run apt update and apt policy again to be certain that the old repository has been removed.
Cleanup of No-subscription
Remove the previous repository from either the:
(deb http://download.proxmox.com/debian/pbs trixie pbs-no-subscription)
/etc/apt/sources.listor/etc/apt/sources-list.d/pbs-install-repo.listor any other.listfile you may have added it to.
Run apt update and apt policy again to be certain that the old repository has been removed.
Note on Clean-ups
Run apt update and apt policy again to be certain that the old repositories have been removed.
Instead of removing older repositories, you can also disable them.
Make sure to check that all the added .list files in /etc/apt/sources.list.d/ got switched over to Trixie correctly.
After you checked that all repositories get picked up correctly with apt policy, refresh the repositories' package index, and must not return any error.
apt updateFinalize the Upgrade
Reboot Into the Updated Kernel
You should reboot now, even if you already used the 6.14 kernel.
This is required to guarantee compatibility with the rest of the system, the updated kernel was build with the newer PVE 9 compiler and ABI versions.
systemctl rebootThe first boot into PBS 4 may take a bit longer.
Disable the Maintenance mode
Replace bpool with the actual name of your pool: tank, backuppool, backup ...
proxmox-backup-manager datastore update bpool --delete maintenance-modeInstead of bpool use your actual pool name
Check Status of Services
Check that the statuses of the main two services are active (running)
systemctl status proxmox-backup-proxy.service proxmox-backup.serviceAfter the Upgrade
Empty the browser cache and/or force-reload the Web UI
- macOS:
⌘ + Alt + R(alt/option ⎇) - Linux/Windows:
CTRL + SHIFT + R
Test that everything is working
Cleanup of Repositories
Clean up of Enterprise
Remove the old /etc/apt/sources.list.d/pbs-enterprise.list file. Run apt update and apt policy again to be certain that the old repository has been removed.
Cleanup of No-subscription
Remove the previous repository from either the /etc/apt/sources.list, /etc/apt/sources-list.d/pbs-install-repo.list or any other .list file you may have added it to.
Note on Clean-ups
Run apt update and apt policy again to be certain that the old repositories have been removed.
Instead of removing older repositories, you can also disable them.
Make sure to check that all the added .list files in /etc/apt/sources.list.d/ got switched over to Trixie correctly.
After you checked that all repositories get picked up correctly with apt policy, refresh the repositories' package index, and must not return any error.
apt updateOptional
Modernize apt Repository Sources
You can migrate existing repository sources to the recommended deb822 style format, by running: apt modernize-sources.
The command will also keep the old.listfiles around by appending.bakto them. So you will have the new.sourcesfiles and the old repository configurations in the.list.bakfiles.
You can remove the leftover backup files once you verified that everything works smoothly with the new format.
New Network feature
Network Interface Name Change
Due to the new kernel recognizing more features of some hardware, like for example virtual functions, and interface naming often derives from the PCI(e) address, some NICs may change their name, in which case the network configuration needs to be adapted.
In general, it's recommended to either have an independent remote connection to the Proxmox Backup Server's host console, for example, through IPMI or iKVM, or physical access for managing the server even when its own network doesn't come up after a major upgrade or network change.
The latest version of Proxmox Backup Server 3.4 and 4.0 provide a package called proxmox-network-interface-pinning that you can install. This package offers a CLI tool that helps you pin all network interfaces to NIC-based names and update the network configuration simultaneously.
Usage
USAGE: pve-network-interface-pinning <COMMAND> [ARGS] [OPTIONS]

       pve-network-interface-pinning generate  [OPTIONS]

       pve-network-interface-pinning help [<extra-args>] [OPTIONS]
Issue the command pve-network-interface-pinning generate to rename all your ethenet ports to stabel nic1, nic2
root@pve-1:~# proxmox-network-interface-pinning generate
This will generate name pinning configuration for all interfaces - continue (y/N)?
y
Name for link 'enp0s18' will change to 'nic0'
Name for link 'enp0s19' will change to 'nic1'
Name for link 'enp0s20' will change to 'nic2'
Name for link 'enp0s21' will change to 'nic3'
Name for link 'enp0s22' will change to 'nic4'
Generating link files
Successfully generated .link files in '/usr/local/lib/systemd/network/'
Updating /etc/pve/nodes/pve-1/...
Updating /etc/network/interfaces.new
Updating /etc/pve/sdn/controllers.cfg
Updating /etc/pve/sdn/fabrics.cfg
Successfully updated Proxmox VE configuration files.

Please reboot to apply the changes to your configuration
Created files
They are stored in /usr/local/lib/systemd/network as link files with name 50-pve-<pnined_name>.link
Updated files
/etc/pve/nodes/pve-1/.../etc/network/interfaces.new/etc/pve/sdn/con
Potential Issues
General
As a Debian based distribution, Proxmox Backup Server is affected by most issues and changes affecting Debian. Thus, ensure that you read the upgrade specific issues for Debian Trixie.
Please also check the known issue list from the Proxmox Backup Server 4.0 changelog: https://pbs.proxmox.com/wiki/index.php/Roadmap#4.0-known-issues
Older Hardware and New 6.14 Kernel
Compatibility of old hardware (10 years or older) isn't as thoroughly tested as more recent hardware. For old hardware it's to test for compatibility on identical or at least similar hardware before upgrading any production machines.
Check the official forums and web-pages for more info.
Systemd-boot meta-packege
Systemd-boot meta-package changes the bootloader configuration automatically and should be uninstalled
See the Proxmox wiki page from References below
References
Breaking changes and Issues [1] Proxmox wiki [2] NIC oinning [3]


