TrueNAS LXC PBS
Proxmox Backup Server is flexible and can be installed on any device running Debian, a VM or a LXC. Here I show my TrueNAS LXC setup, as my main production has moved to my new TrueNAS CE box. Having PBS on the NAS is making use of the large and fast SAS ZFS RAID 10 storage.

Preparation
- Create a Bridge for the LXC to use. On
bond0I havebr0with my main IP. - Create a user:
pbsbackup
If you want to use a VM, see my ofter blog, TrueNAS VM PBS
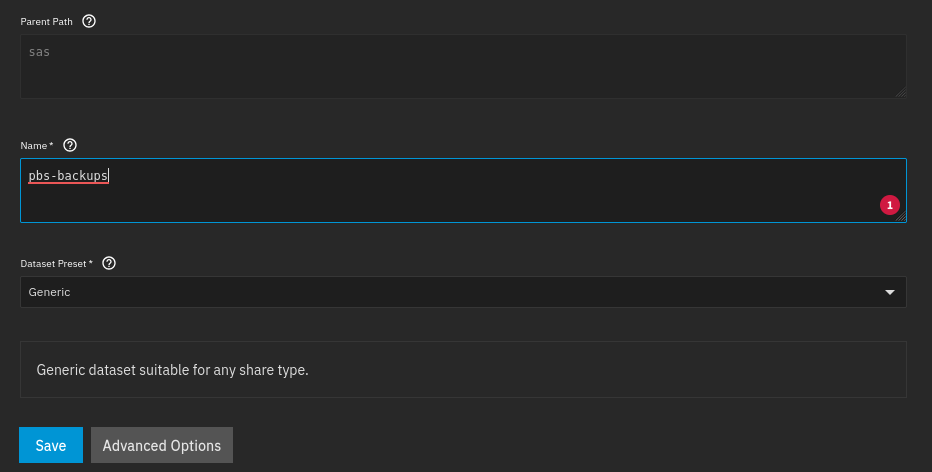
Create a dataset and share
Go to Datasets, point to the correct pool and hit Add dataset for the PBS data. Select a Name for this dataset, like pbs-backups, leave Dataset Preset as generic.
Change the properties
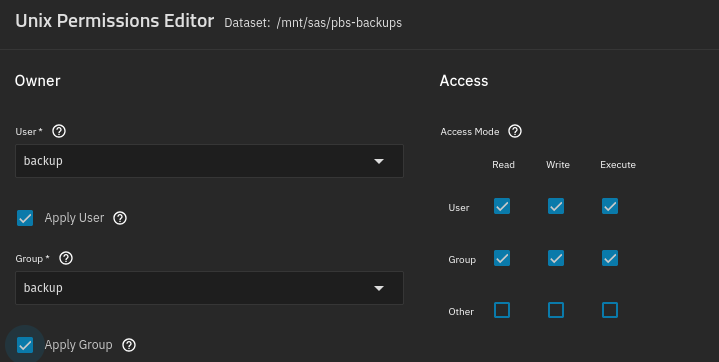
Roles
- Hit
Create NFS Share→Advanced Options→Maproot Userand set to root
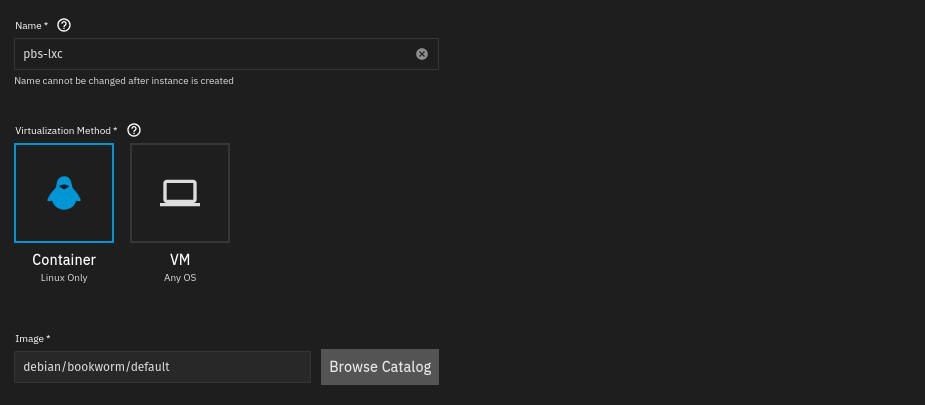
Create a LXC for PBS
- Go to Instances and Create a new Instance Container with the default Debian Bookworm Image. Leave all as default, and start it up by hitting
Create.
PBS Installation
We need to use shell for the rest of the installation.

Run these Commands in the LXC shell.
Update the packages
sudo apt-get update && sudo apt-get dist-upgrade -yAdd wget
sudo apt install wget -yAdd the PBS-No-Subscription repository
echo "deb http://download.proxmox.com/debian/pbs bookworm pbs-no-subscription" | sudo tee -a /etc/apt/sources.listDeactivate the Enterprise repository
sed -i '/enterprise/ s/^/#/' /etc/apt/sources.list.d/pbs-enterprise.listAdd GPG keys
wget https://enterprise.proxmox.com/debian/proxmox-release-bookworm.gpg -O /etc/apt/trusted.gpg.d/proxmox-release-bookworm.gpgUpdate the LXC
sudo apt update && apt upgrade -yInstall the Proxmox Backup Server
sudo apt update && apt install proxmox-backup -yWhen the mail config screen comes up, select Local only and hit OK
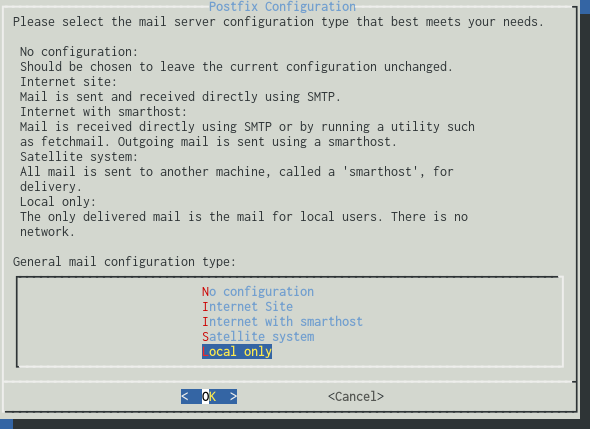
For the System mail name, hit OK to accept the LXC name
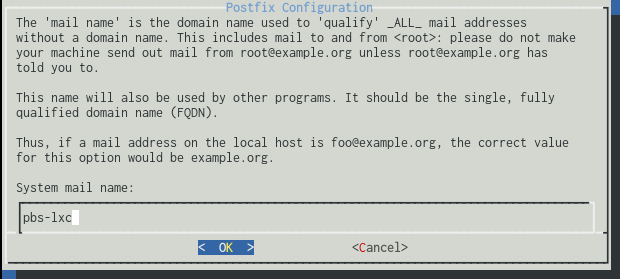
Get the IP of the PBS
echo "https://$(ip -4 addr show $(ip route | grep default | awk '{print $5}') | grep inet | awk '{print $2}' | cut -d/ -f1):8007"Set the root password
passwd rootOnce the commands prompts for it, enter a root password and repeat the password
Check for success
- In your browser, go to the printed IP address to access the
webui. The commands will print the IP address just before asking you to create a root password. - Login to the
webuias root and the password you just created
Add the Dataset to the LXC
This will be done in the System Shell
Go to System → Shell and run the following as root:
- <container-name> ⇒ the name of the container,
pbs-lxc - mkdir -p ⇒ Create a mount point inside the container with a name,
backup - path= ⇒ is the mount point in the LXC
- <mnt/pool/dataset> ⇒ use your Dataset from the host
sudo su
sudo incus exec <container-name> -- mkdir -p /backup && sudo incus config device add <container-name> mydataset disk source=<mnt/pool/dataset> path=/backup shift=true
Mount the Dataset
sudo incus exec <container-name> -- mkdir -p /backup &&
sudo incus config device add <container-name> mydataset disk source=/mnt/tank/pbs path=/backup shift=true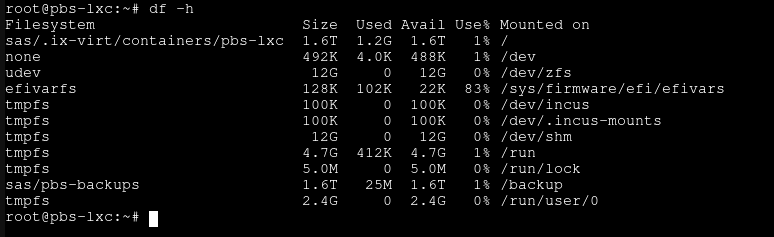
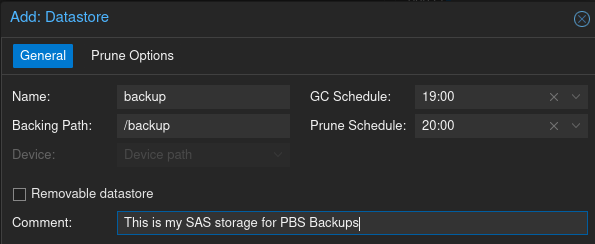
Add the Datastore
Go to the PBS GUI and hit Add Datastore and add the Datastore you created.
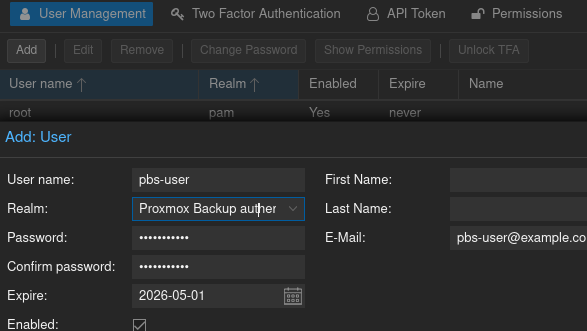
Create a Datastore admin user on PBS GUI
Go to Acces Control and add a new user, pbs-user to the PBS realm
Go to Datastore → backup → Permissions and add this user as a DatastoreAdmin

Final steps – if you didn't do this step earlier
If you don't have a subscription
Go to Configuration → Administration → Repositories and do the following:
- Add the
PBS-No-Subscriptionrepository - Disable the
Enterprise repository
Set up your functions
Now add the New backup server to your nodes and set up the parameters for all your backups as for the Prune & GC and Verification. If you have several PBS servers, set the Sync Jobs as needed according to your backup-strategy.
Example, simplification
Backups run during the night to minimize network traffic during daytime. The way PBS do its backups, they are extremely fast (incremental) after the first time, and uses minimum storage space (my Deduplication Factor is 85.33 after almost 3 years).
- Garbage Collection, daily @ 19.00
- Verification, daily @ 20:00
- Sync Job, daily @ 21.00
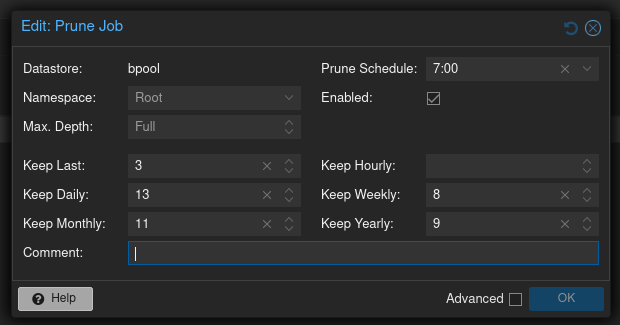
- Prune job, daily @ 7:00
Initial runs
Do the initial runs by hand and add the schedule after that.
Add the PBS to your PVE
Go to your cluster or stand-alone PVE Datasenter → Storage and add PBS.
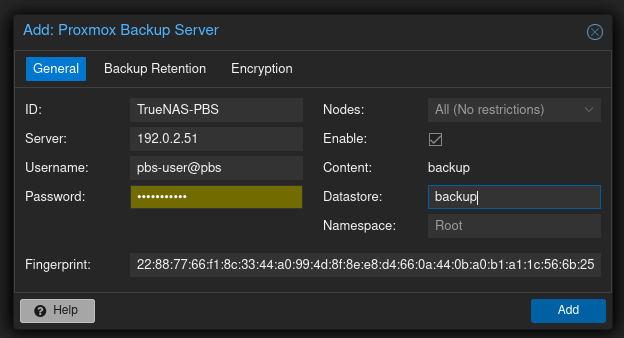
You should also set the Backup Job calling the new PBS and set the Schedule and Selected Nodes, Note Template (Cluster, Guest name, Node, VM ID) and other. The Retention is set on the PBS according to your strategy.
{{cluster}}, {{guestname}}, {{node}}, {{vmid}}Note Template example
Removing the Nag Screen
echo "DPkg::Post-Invoke { \"dpkg -V proxmox-widget-toolkit | grep -q '/proxmoxlib\.js$'; if [ \$? -eq 1 ]; then { echo 'Removing subscription nag from UI...'; sed -i '/data\.status.*{/{s/\!//;s/active/NoMoreNagging/}' /usr/share/javascript/proxmox-widget-toolkit/proxmoxlib.js; }; fi\"; };" >/etc/apt/apt.conf.d/no-nag-script- read the code before executing
- fully understand what the script is trying to do
- fix any issues, including security issues, on your own
References
PBS [1] Incus [2] Proxmox VE Helper-Scripts [3] LinuxContainers [4]
Proxmox Backup Server homepage, Features, System Requirements,
Download, Get Started, Installation Guide ↩︎Incus is a container and virtual-machine manager.
Based on LXC for containers and QEMU for virtual machines, it offers a seamless cloud-like experience scaling from a developer's laptop to a full cluster of up to 50 servers. In addition to managing containers and VMs, Incus also provides a variety of options to manage storage and network. GitHub, Documentation. Security of LXC ↩︎Proxmox Community Scripts is a set of scripts for doing things by copy-past. Note, even if thes scripts make things easy it is not easy, you need to fully understand what the script is doing and be prepared to fix it and take care of security on youre own. homepage, GitHub, PBS Post Install ↩︎


