Proxmox No Subscription Nag
Who hates the Proxmox nagging screen? We all do. Working on corporate systems you do not see it, but at home it's there every time you need to log in to the GUI. This is how you get rid of the Proxmox No Subscription Notice screen. How to use SSH keys. Tested and works on Proxmox PVE 9 and PBS 4.


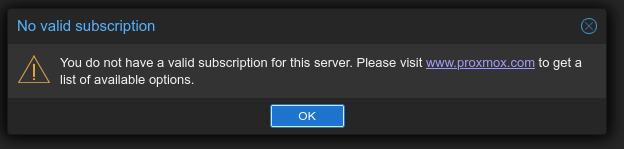
If you use the GUI a lot, you might get frustrated to click the ok on this notification. For me, it hasn't been a problem until recently. I have been working in GUIs for the past week doing a ton of tests, upgrades, and tuning. The way Proxmox do it is vulgar, I prefer the polite way Portainer and others do it, just a remainder somewhere on the page, it can be in bright colors or not, but it does not interfere with your work. If I could afford I would get a basic license but having 9 servers, most with 2 CPUs, it's too expensive for a retired person.
I love free software and consider it as free advice — not free beer 🍺. Supporting any FOSS project is very important,
– I do contribute when I can or
– give them a star ⭐ or
– make some monetary contribution.
In my humble opinion – if we only consume and not contribute it will kill the free and open movement.
Prerequisites and Recommendations
Use the No-subscription repo. I recommend to use SSH, but you can use the console from the GUI.
It's recommended to have your SSH-keys on the server. Replace id_ed25519.pub with your public SSH key for the server.
Using the SSH config and agent will make your life easier.
ssh-copy-id -i ~/.ssh/id_ed25519.pub <Address of Server>Example of how to copy a key. Please use individual passwords and keys for each server.
Edit the SSH-config file in your .ssh folder add a server like this
Host pve-100
  HostName pve-100.example.com
  User theboss
  IdentityFile ~/.ssh/pve100
Start the SSH agent
eval "$(ssh-agent -s)"Add your key to the SSH agent by
ssh-add ~/.ssh/id_ed25519Warnings and Notes
⚖️ Using this in a commercial environment may be illegal in your country
ℹ️ This modification is reversible by removing the edit
ℹ️ Should work on PVE/PBS. It's tested OK on, PVE 5.1 – 9.0 and PBS 2.1 – 4.0
⚠️ When you update Proxmox, you might need to redo this modification
⚠️ This modification will probably break the GUI Updates page notifications
- A “No updates available.” message all time, even if there is one
- Do updates over SSH by
apt update && apt dist-upgrade -y👈
Do the Modification
The Manual Editing of proxmoxlib.js
- Change to the right directory and make a backup
cd /usr/share/javascript/proxmox-widget-toolkitcp proxmoxlib.js proxmoxlib.js.orig- Edit the file
nano proxmoxlib.jsand locate the code (ctrl+wto search for “No valid subscription”)
nano proxmoxlib.js- Replace text to look like this (insert
void({ //at the beginning of the line)
Ext.Msg.show({
  title: gettext('No valid subscription'),
void({ //Ext.Msg.show({
title: gettext('No valid subscription'),- Restart the Proxmox web service
systemctl restart pveproxy.serviceOn any Proxmox VE
systemctl restart proxmox-backup-proxy.serviceOn any Proxmox Backup Server
Check in a private window if it works, or clear your browser cache, depending on the browser you may need to open a new tab or restart the browser.
Using the sed -command
This is combined into a sed command to change line 617:
sed -i.bak 's/Ext\.Msg\.show(/\/\/ Ext.Msg.show(/' /usr/share/javascript/proxmox-widget-toolkit/proxmoxlib.js && systemctl restart pveproxy.service For a Proxmox Virtual Environment
sed -i.bak 's/Ext\.Msg\.show(/\/\/ Ext.Msg.show(/' /usr/share/javascript/proxmox-widget-toolkit/proxmoxlib.js && systemctl restart proxmox/backup/proxy.service For a Proxmox Backup Server
This command:
- Creates a backup (proxmoxlib.js.bak)
- Targets the line where the subscription dialog appears
- Simply comments out the
Ext.Msg.show(call by adding//at the beginning - Then restarted the service
proxmox-backup-proxy.service
Revert the Modification
By editing the file
Edit the file to undo the changes you made, void({ //
nano /usr/share/javascript/proxmox-widget-toolkit/proxmoxlib.js Restore the backup file you created
mv /usr/share/javascript/proxmox-widget-toolkit/proxmoxlib.js.orig /usr/share/javascript/proxmox-widget-toolkit/proxmoxlib.jsReinstall the toolkit from the repository
apt-get install --reinstall proxmox-widget-toolkit Jamesits
Another way
First ssh into the node as root.
You need to edit the file one proxmoxlib.js.
nano /usr/share/javascript/proxmox-widget-toolkit/proxmoxlib.jsSearch for the function responsible for the subscription status. In nano, you can press Ctrl + W to open the search function and search for NoValidSubscription.
if (res === null || res === undefined || !res || res.data.status.toLowerCase() !== 'active') {
    Ext.Msg.show({
        title: gettext('No valid subscription'),
        icon: Ext.Msg.WARNING,
        message: Proxmox.Utils.getNoSubKeyHtml(res.data.url),
        buttons: Ext.Msg.OK,
        callback: function(btn) {
            if (btn === 'ok') {
                console.debug('User acknowledged no subscription message');
            }
        }
    });
}
The part of the file responsible for the nag screen.
Comment out the code that displays the nag screen, use //.
// if (res === null || res === undefined || !res || res.data.status.toLowerCase() !== 'active') {
//    Ext.Msg.show({
//        title: gettext('No valid subscription'),
//        icon: Ext.Msg.WARNING,
//        message: Proxmox.Utils.getNoSubKeyHtml(res.data.url),
//        buttons: Ext.Msg.OK,
//        callback: function(btn) {
//            if (btn === 'ok') {
//                console.debug('User acknowledged no subscription message');
//            }
//        }
//    });
// }


