Proxmox New - Install
How to Install and Configure the Proxmox Virtual Environment (PVE).


Introduction
Proxmox Virtual Environment (Proxmox VE, PVE) is a powerful open-source platform for virtualization that combines two virtualization technologies:
- KVM (Kernel-based Virtual Machine) for virtual machines and
- LXC (Linux Containers) for lightweight container-based virtualization.
The recommended FS is ZFS that is very well integrated.
The GUI is a nice way of getting used to the system.
Setup Proxmox VE
Installation
Follow the official Proxmox VE installation guide to install Proxmox on your server. Ensure that your hardware supports virtualization, and you have a compatible CPU. Add the Microcode Update, link to my post.
Repositories, and Add and Disable according to your needs.
Install Proxmox VE on Debian – needs good Linux skills
Proxmox VE ships as a set of Debian packages and can be installed on top of a standard Debian installation. After configuring the repositories, you need to run the following commands:
# apt-get update && # apt-get install proxmox-veInstalling on top of an existing Debian installation looks easy, but it presumes that the base system has been installed correctly and that you know how you want to configure and use the local storage.
⚠️ You need to configure the network manually.
Without a license.
In the GUI:
Node→Updates→Repositories: add No-Subscription and disable the Enterprise
ACME
Use Let's Encrypt Certificates. See how to set up, link to ACME setup.
Firewall
The Proxmox firewall is a powerful part of the Proxmox virtualization solution and can do many things that admins can use to their advantage, such as controlling traffic and making sure certain things like allowing clients or hosts to connect to certain VMs or otherwise.
⚠️ Make sure not to lock your self out! Open port 8006 and 22.
See the blog post Proxmox New Install - Network
Notifications
See my post, on how to use Gotify.
WOL – Wake on LAN
We all have devices that we don't use every day. It's convenient to do a WOL on these devices when they're needed. They may run services that are not needed often, or they may be started when demand grows. For me, this is important because most devices are not in the lab, but in another building. See my blog.
Add a New Admin User
Create a new superuser, you DO NOT want to run everything as root!
- Add the user on Debian,
adduser <username>and use a strong password - For SSH use, add the user to the
sudogroupusermod -aG sudo <username> - Add an Admin Group (Path: /, Group: Admins, Role: Administrator)
- Add the user to the Proxmox Admin PAM users
You will need more groups and users later.
Passwords can be changed by using the passwd command. To change someone else's password, use sudo passwd <username> or do it as the root user.
SSH
SSH is one of the most used tools for controlling servers. You should be familiar with it. See my post
Create your keys
You may use only one but more is better, use a passphrase or not, you should use a comment, and you need to set the output file pair's name (PVE).
Link to Admin Users in Proxmox
On your PC/Laptop
ssh-keygen -t ed25519 -C "local root" -O PVECopy the key to your server
ssh-copy-id -i ~/.ssh/PVE.pub <USER@SERVER_IP>Add the new server to your .ssh/config for easy SSH access, ssh pve-47
Now, when all that it’s done, you can safely and easy log in to the server.
– chmod 700 /home/<new_user>/.ssh
– chmod 600 /home/<new_user>/.ssh/authorized_keys
– chown -R <new_user>:<new_user> /home/<new_user>/.ssh
root SSH login without an SSH key.Advanced Configurations
IOMMU
For some apps, you need to pass PCI devices to them, to make them functional.
This mean two things: you can't use a CT, and you need IOMMU.
Storage Configuration
When you install Proxmox I recommend to use ZFS, it creates rpool.
If you didn't use the full disk for it, you can add a partition for other stuff.
In the Harddisk options screen hdsize is in GiB not GB as stated.
Would I utilize it? No. Something like 16–32 GB should be fine, but remember to clean out old junk, such as old kernels.
If you still use LVM and run out of space, as I did, see my blog how to resize.
ZFS Storage
Proxmox supports the use of ZFS for advanced storage features. Install the ZFS package. It's installed by default on newer systems.
sudo apt-get install zfsutils-linuxCreate a ZFS pool for your virtual machine storage
sudo zpool create vm_storage /dev/nvme0n1Replace /dev/nvme0n1 or /dev/sdX with your disk identifier.
Typical pools to create
- rpool is created on the boot disk, an Enterprise grade SSD is fine
and a mirror is super or required for HA - vmpool m.2 or SSD/NVMe SSD the faster, the better
- On all nodes for migration of VMs
- tank the standard name for ZFS pools, SSD/NVMe SSD
- Special case, only on a few nodes
- bpool for backups, spinning rust is fine
- PVE/PBS hybrids use it for the PBS storage
- General Backup, if needed
- dpool for NAS storage, SSD is nice, but larger pools are on spinning rust
- bpool for backups, spinning rust is fine
zpool export dpool -fImporting an old ZFS pool on a new machine:
– Search for it
zpool import– Import it
zpool import dpool -fOther Storage
- NFS pools on storage servers will be added
- PBS storage for backups and re-installing
In fstab set, the UUID.
List your pools, zpool list (same as PVE GUI) and check them with zfs list.
Now you can create Directories and Pools. If you make mistakes, use fdisk sfdisk -f --delete /dev/sda 4 to wipe the disk, the GUI might not let you do it.
1 Gibibyte is equal to (230 / 109) gigabytes.
Gigabyte is the unit of digital information with prefix giga (109). 1 Gigabyte is equal to 1,000,000,000 bytes = 109 bytes in decimal (SI). 1 Gigabyte is equal to 1,073,741,824 bytes = 230 bytes in binary.
– Gigabyte is the unit of data with SI decimal prefix Giga. 109 bytes
– Gibibyte is the unit of data with IEC binary prefix Gibi. 230 bytes
Networking
You never want to manage the hypervisor host on the same network on which other clients and servers exist! If an attacker has compromised the network where a client resides, you don’t want them to have easy Layer 2 access to the management interface of your hypervisor. Link to detail instructions.
⚠️ Set up a VLAN for the management Interface for increased security
If you change the IP
- do pvecm updatecerts --force to update Certificates
- update your DHCP and DNS
A Linux Bond is also called NIC teaming or Link Aggregation.
– It's generally advised to use bonding mode and VLAN.
Corosync don't need a bond for network redundancy, can switch between networks, if one becomes unusable, without a bond.
No Gateway: Use this for an isolated VLAN where communication is local (like a storage VLAN).
With a Gateway: Use this when you need the VLAN to communicate with other networks, route traffic externally, or access other services through the firewall.
Firewall
Activate all 3 levels (Datacenter, Node and VM). Link to my PVE Firewall post.
Block all access, other than the Management VLAN, to access port 8006!
⚠️ Make sure not to lock your self out!
VLAN 802.1Q tagging
With the VLAN aware bridge, you can have many other VLAN configured on many other virtual machines, and each of them can communicate on the same VLAN interface.
The VLAN ID is part of the Layer 2 Ethernet frame. If the physical interface of the switch port is not configured correctly, VLAN traffic for the VLAN ID is discarded.
A VLAN aware interface communicates over a trunk/tagged port.
Proxmox configures a VLAN aware bridge-vids to 2-4094.
Cisco calls:
– a port's PVID its native VLAN
– a tagged port, a trunk port
– an untagged/member port, an access port
Using VLAN tags on a VM
When you create VMs, you can choose to tag the network traffic with a VLAN ID. This allows sending the VM traffic through the physical device VLAN interface to the rest of the physical network.
Segregation of Traffic
Using separate NIC for things like Management and Storage Using VLAN Corosync should be left on a separate vmbr and a separate NIC.
Corosync directly defined
In /etc/network/interfaces
auto eth1
iface eth1 inet static
        address 10.10.1.151
        netmask 255.255.255.0
In /etc/hosts
127.0.0.1 localhost.localdomain localhost
192.0.2.151 one.example.com one pvelocalhost

# corosync network hosts
10.10.1.151 one-corosync.example.com one-corosync
10.10.1.152 two-corosync.example.com two-corosync
10.10.1.153 three-corosync.example.com three-corosync

# For IPv6 capable hosts
[...]
Bonding and VLAN
For high availability and improved network performance, consider setting up network bonding. Edit the network configuration file
sudo nano /etc/network/interfacesExample Bonding Configuration:
...

auto bond0
iface bond0 inet manual
        bond-slaves enp3s0f0 enp3s0f1
        bond-miimon 100
        bond-mode 802.3ad
        bond-xmit-hash-policy layer2+3
#Bonded VLAN - Red+Green Cables

auto vmbr0
iface vmbr0 inet static
        address 192.0.2.100/24
        gateway 192.0.2.1
        bridge-ports bond0
        bridge-stp off
        bridge-fd 0
        bridge-vlan-aware yes
#LAN VLAN-aware bridge

auto vmbr10
iface vmbr10 inet manual
        address 10.10.10.100/24  # Block access in PVE FW
        gateway 10.10.10.1       # For using Lab FW
        bridge-ports bond0.10
        bridge-stp off
        bridge-fd 0
#MGMT vLAN

auto vmbr0.40
iface vmbr0.40 inet static
        address 10.10.40.100/24  # A storage net usually don't have a GW
#SRV vLAN

source /etc/network/interfaces.d/*
Replace the settings with your system information.
Set up a Management VLAN
Set up a VLAN and remove your original IP Address and Gateway,
- Add a new IP and GW to your Management VLAN
- Change the IP in the
/etc/hoststo the new one andifreload -ato activate - Update Certificates,
pvecm updatecerts --force - Add your new IP to your DHCP/DNS and activate
- Create a Firewall Alias for the Management Network
- Create an Anti Lockout rule
- Block access to the Management VLAN from all other Networks/VLAN
auto bond0
iface bond0 inet manual
bond-slaves enp3s0f0 enp3s0f1
bond-miimon 100
bond-mode 802.3ad
bond-xmit-hash-policy layer2+3
auto vmbr0
iface vmbr0 inet static
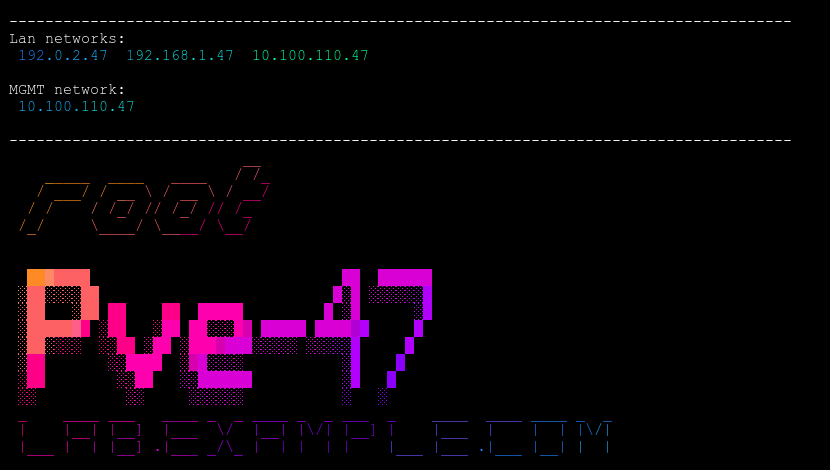
address 192.0.2.47/24
gateway 192.0.2.1
bridge-ports eno1
bridge-stp off
bridge-fd 0
bridge-vlan-aware yes
bridge-vids 2-4094
vmbr0.100
iface vmbr0.100 inet static
address 10.100.110.47/24
#MGMT network-networkUsing DHCP Static Reservations
One trick, from the corporate world, is to use DHCP servers to handle all addresses in the total environment. You need to set up static reservations on the DHCP servers and update the DNS servers. Now, if you are forced to change the address space, it will automatically be reflected by all your servers instead of spending days doing it.
iface enp5s0 inet manual

auto vmbr0
iface vmbr0 inet dhcp
    bridge-ports enp5s0
    bridge-stp off
bridge-fd 0
Use Let's Encrypt Certificates
They are free, you can use the GUI to set them up. See my blog Set up ACME post.
SDN
Software Defined Networking, see my posts Setup SDN and Setup SDN 2 and the Documentation, and the wiki's SDN and Setup Simple Zone.
After installing the SDN dependencies, enable SDN by adding a line to the interface configuration. If you upgrade from an older version, you need to install the libpve-network-perl package on every node.
source /etc/network/interfaces.d/*Add if missing to /etc/network/interfaces
To use the automatic DHCP feature, you need to install dnsmasq and disable it.
apt install dnsmasq && systemctl disable --now dnsmasqThere are a few types of Zones you can create. These include:
- Simple: The simple configuration is an Isolated Bridge that provides a simple layer 3 routing bridge (NAT)
- VLAN: Virtual LANs enable the traditional method of dividing up a LAN. The VLAN zone uses an existing local Linux or OVS bridge to connect to the Proxmox VE host’s NIC
- QinQ: Stacked VLAN (IEEE 802.1ad)
- VXLAN: Layer 2 VXLAN network that is created using a UDP tunnel
- EVPN (BGP EVPN): VXLAN that uses BGP to create Layer 3 routing. In this config, you create exit nodes to force traffic through a primary exit node instead of using load balancing between nodes.
Backup Strategies
Proxmox Backup Server
Utilize Proxmox Backup Server (PBS) for automated backups. Install and configure the backup server on a separate machine. PBS can be run on a machine running PVE, see the wiki. Use a 3-2-1 strategy for safety.
High Availability (HA)
HA Cluster – You should have a License
Set up a High Availability Cluster for improved reliability. Refer to the Proxmox documentation for step-by-step instructions. Needs a storage solution that is also HA, Ceph is included as an option. Ceph works the best with 5 or more nodes, and 3 is the minimum.
Performance Tuning
Adjusting VM Resources
Fine-tune virtual machine resources like CPU, RAM, and disk I/O according to workload requirements.
NUMA Optimization
If your server supports NUMA architecture, configure Proxmox to optimize performance
echo "options kvm_intel nested=1" > /etc/modprobe.d/kvm-nested.confBASH Ricing
Add your personal .bash_prompt and .bash_aliases. And do the configuration. Add this line to the end of .bashrc:
echo "[[ -f ~/.bash_aliases ]] && . ~/.bash_aliases" >> .bashrcOr download my preferences
wget https://github.com/nallej/MyJourney/raw/main/BashAddon.sh

chmod +x BashAddon.sh

./BashAddon.sh
SSH-Shell prompt Ricing
See my blog post for details and why.
Install Fail2ban on the nodes
This is the first step of hardening the Proxmox Server. Explained in my blog.
apt-get update && apt-get install fail2ban -yMake a Local Copy
cp /etc/fail2ban/jail.conf /etc/fail2ban/jail.localAdd to the end of jail.local
nano /etc/fail2ban/jail.local[proxmox]
enabled = true
port = https,http,8006
filter = proxmox
backend = systemd
maxretry = 3
findtime = 2d
bantime = 1hAdd to the end of /etc/fail2ban/jail.local
Create the Proxmox configuration
nano /etc/fail2ban/filter.d/proxmox.conf[Definition]
failregex = pvedaemon\[.*authentication failure; rhost=<HOST> user=.* msg=.*
ignoreregex =
journalmatch = _SYSTEMD_UNIT=pvedaemon.service/etc/fail2ban/filter.d/proxmox.conf
Restart Fail2ban
systemctl restart fail2banAdd my favorite add-on apps
I want to have some special apps for testing purposes
Don't run things blindly, select with you need and add them. See References for links to them all and some more. Debian is conservative, and many apps are a few year old, this is good for stability. If you need a newer version, see the documentation how to install from source.
Lab apps
apt-get update && apt-get install -y iperf3 ethtool net-tools etherwake hwinfo lm-sensors i2c-tools hddtemp btop tshark Other supporting apps
apt-get update && apt-get install -y zabbix-agent intel-microcode spice-vdagentNice to have
apt-get update && apt-get install -y bat exa fzf figlet If you upgraded from an older system, SDN will need to add
apt-get update && apt-get install libpve-network-perlIf you plan to use Open vSwitch
apt-get update && apt-get install openvswitch-switch -yLSD – A better ls-command for SSH
Add a nerd font you like to/usr/share/fonts/ you need to have unzip installed
wget -P /usr/share/fonts/JetBrains/mono https://github.com/ryanoasis/nerd-fonts/releases/download/v3.2.1/JetBrainsMono.zip && cd /usr/share/fonts/JetBrains/mono && unzip JetBrainsMono.zip && rm JetBrainsMono.zip && fc-cache -fvwget https://webi.sh/lsdMake lsd executable chmocd +x lsd. Add a nerd font and execute ./lsd and it will aske you to execute source ~/.config/envman/PATH.env.
Exa/Eza – A modern alternative to the ls-command
Exa isn't maintained, see eza. You may need to install a nerd font.
EZA has support for a lot of: Display options, Filtering options, Long view options and Custom Themes (theme.yml) see Eza-Themes. Eza Installation
Installation of eza
apt update && sudo apt install -y gpgmkdir -p /etc/apt/keyringswget -qO- https://raw.githubusercontent.com/eza-community/eza/main/deb.asc | gpg --dearmor -o /etc/apt/keyrings/gierens.gpgecho "deb [signed-by=/etc/apt/keyrings/gierens.gpg] http://deb.gierens.de stable main" | tee /etc/apt/sources.list.d/gierens.listchmod 644 /etc/apt/keyrings/gierens.gpg /etc/apt/sources.list.d/gierens.listapt update && apt install -y ezaFind an icon, link
FZF
Fuzzy find may be of great help to find stuff on large servers.
LM sensors
Linux monitoring sensors (lm-sensors) is a free and open-source application that provides tools and drivers for monitoring temperatures, voltage, and fans. i2c-tools is an add-on.
Running ARM64 Virtual Machines
apt-get update && apt-get install pve-edk2-firmware-aarch64Personalization
I have my own .bash_alias and .bash_prompt on GitHub
Upgrading PVE
The best way is to
apt-get update && apt-get full-upgrade && apt-get autoremove && fstrim -aConclusion
- You can enhance your virtualized environment's performance, reliability, and scalability – and you should do so.
- It's recommended to test changes in a test lab before applying them to a production system.
- Regularly check the documentation for, changes, updates and best practices.
- RAID is not a backup – use a real 3-2-1 backup strategy and proper HW.
References
Proxmox [1] [2] [3] [4] [5] [6] [7] Corosync [8] Ceph [9] intel-microcode [10]
Debian [11] lm_sensors [12] [13] eza [14] lsd [15] fzf [16] iperf3 [17] ethtool [18] net-tools [19] [20] etherwake [21] hwinfo [22] zabbix [23] btop [24] bat [25] figlet [26] [27] spice-vdagent [28] smartmontools [29] Cockpit [30] [31]
Proxmox Virtual Environment Documentation, Wiki pages ↩︎
Proxmox Backup Server Documentation, Wiki pages ↩︎
Proxmox is one word with a lower-case
m. No camel case media-kit. ↩︎Installing Proxmox VE Documentation ↩︎
Ceph, The Future of Starage homepage, [Wikipedia](https://en.wikipedia.org/wiki/Ceph_(software) ↩︎
lm-sensors provides tools and drivers for monitoring temperatures, voltage, and fans. Addon i2c-tools homepage, This wiki explains how to install, configure, and use. ↩︎
hddtemp is a small utility (with daemon) that gives the hard-drive temperature via S.M.A.R.T. (for drives supporting this feature). homepage, GitHub. Note:
A more versatile option to access drives temperatures is lm_sensors, as it also handles other data. ↩︎exa is unmaintained, use the fork eza, homepage instead.
The unsupported exa, homepage ↩︎fzf Fuzzy find can be of great help to find stuff on large servers.GitHub, homepage ↩︎
iperf3: A TCP, UDP, and SCTP network bandwidth measurement GitHub, homepage. Another homepage, download, Documentation ↩︎
ethtool is the primary means in Linux kernel-based operating systems (primarily Linux and Android) for displaying and modifying the parameters of network interface controllers (NICs) and their associated device driver software from application programs running in userspace.
Homepage and Download, man page, Wikipedia, Kernel.org homepage ↩︎Net-tools is a collection of base networking utilities. It includes arp, hostname, ifconfig, ipmaddr, iptunnel, mii-tool, nameif, netstat, plipconfig, rarp, route, and slattach. GitHub, homepage ↩︎
etherwake generates and transmits a Wake-On-LAN (WOL) "Magic Packet", used for restarting machines that have been soft-powered-down (ACPI D3-warm state). GitHub man page ↩︎
hwinfo is a hardware information tool by SUSE
GitHub Another one GitHub ↩︎Zabbix is an open-source software tool to monitor IT infrastructure such as networks, servers, virtual machines, and cloud services. Zabbix collects and displays basic metrics. homepage ↩︎
btop++ shows usage and stats for processor, memory, disks, network and processes. It has a game inspired menu system, mouse support, GPU monitoring, themes and more features GitHub. An alternative to the traditional htop, GitHub homepage. Older version ot btop++ Bashtop PBYTOP. Glances on GitHub, homepage ↩︎
bat A cat clone with wings: syntax highlighting and Git integration. GitHub ↩︎
The SPICE agent helps run graphical applications such as
virt-managermore smoothly, by helping integrate the guest operating system with the SPICE client. page ↩︎Smartmontools (S.M.A.R.T. Monitoring Tools) is a set of utility programs (
smartctlandsmartd) to control and monitor computer storage systems wiki ↩︎Cockpit modules File Sharing, Navigator, Identities and other fine tools by 45 Drives Ltd. a subsidiary of Protocase Inc. homepage. ↩︎


