NetBootXYZ using Docker
In a home lab, you will use a lot of different OSes and a lot of tools to investigate issues. I use iPXE or 'pixie boot' to install them. I use Docker and Dockge to install NeytBootXYZ. You can download assets on demand or store them on your server. I am using Docker and Dockge to install it.


Make things easy in a home lab.
This post covers installing and setting up 3 things: Docker-CE, Dockge and NetBootXYZ. The end game for this is to create a iPXE Boot VM/CT.
Replacing all the memory sticks you carry along, do this: The easy way to install an OS is to use “pixie boot”, NetBootXYZ does that. By default, it brings the needed files from the internet, but if you fave a slow connection, you can have the files on your server. Adjust disk size accordingly.
Including Proxmox VE 8.1-2, BS 3.1-1 and MG 8.1-1
Install Docker-CE by a script from Docker
As Docker is recommended to be installed on an Ubuntu VM, we will do just that.
Copy the script from docker.com
curl -fsSL https://get.docker.com -o get-docker.shTest the script with a dry-run
sudo sh ./get-docker.sh --dry-runShows the steps, but the option dry-run inhibits the installation.
Install Docker-CE
We'll install docker-ce docker-ce-cli containerd.io docker-compose-plugin docker-ce-rootless-extras docker-buildx-plugin and all dependable.
sudo sh ./get-docker.shThe installation will be performed by the script without any options.
Grant non-root users access to Docker
To create the docker group and add your user:
- Create the
dockergroup, should be created already.
sudo groupadd docker- Add your user to the
dockergroup.
sudo usermod -aG docker $USER
- Log out and log back in so that your group membership is re-evaluated.
The installation script requires root or sudo privileges to install and use Docker. If you want to grant non-root users access to Docker, refer to the post-installation steps for Linux. You can also install Docker without root privileges, or configured to run in rootless mode. For instructions on running Docker in rootless mode, refer to run the Docker daemon as a non-root user (rootless mode).
About remapping and subordinate user and group IDs
The remapping itself is handled by two files: /etc/subuid and /etc/subgid. Each file works the same, but one is concerned with the user ID range, and the other with the group ID range. Consider the following entry in /etc/subuid:
testuser:231072:65536This means that testuser is assigned a subordinate user ID range of 231072 and the next, 65536 integers in sequence. UID 231072 is mapped within the namespace (within the container, in this case) as UID 0 (root). UID 231073 is mapped to UID 1, and so forth. If a process attempts to escalate privilege outside the namespace, the process is running as an unprivileged high-number UID on the host, which does not even map to a real user. This means the process has no privileges on the host system at all.
Install Dockge
A fancy, easy-to-use and reactive self-hosted docker compose.yaml stack-oriented manager. It's a Portainer replacement, and it's not that. For my home lab it is mostly that, but I also use Portainer for a few of my Docker VMs.
Create directories
mkdir -p /opt/stacks /opt/dockge && cd /opt/dockgeCreate a directory for your stacks and one for Dockge – switch to the Dockge stack
Download the compose.yaml
curl https://raw.githubusercontent.com/louislam/dockge/master/compose.yaml --output compose.yamlStart the Dockge server
docker compose up -dInstall your stacks
Open the page <IP of VM/CT>:5001 and create your Dockge user.
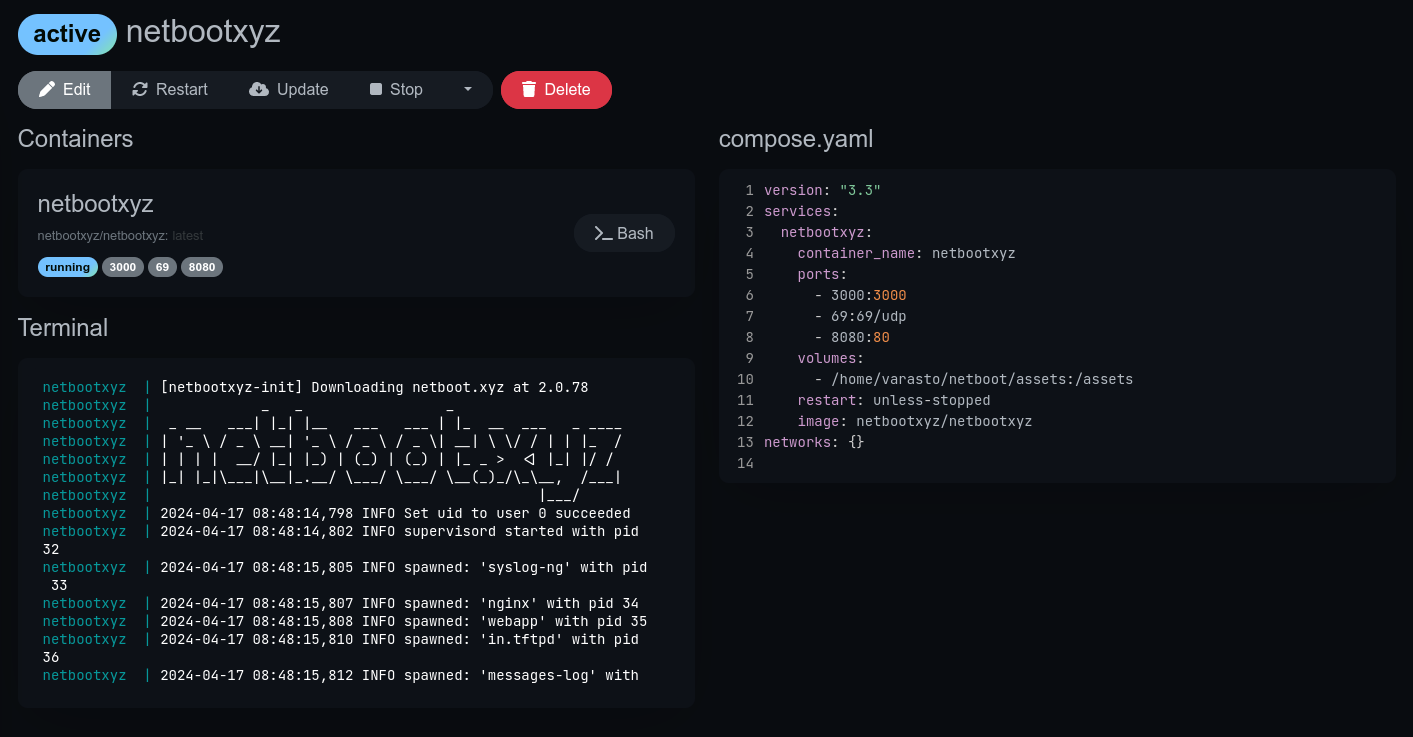
Create a stack by replacing the nginx stuff with your thing
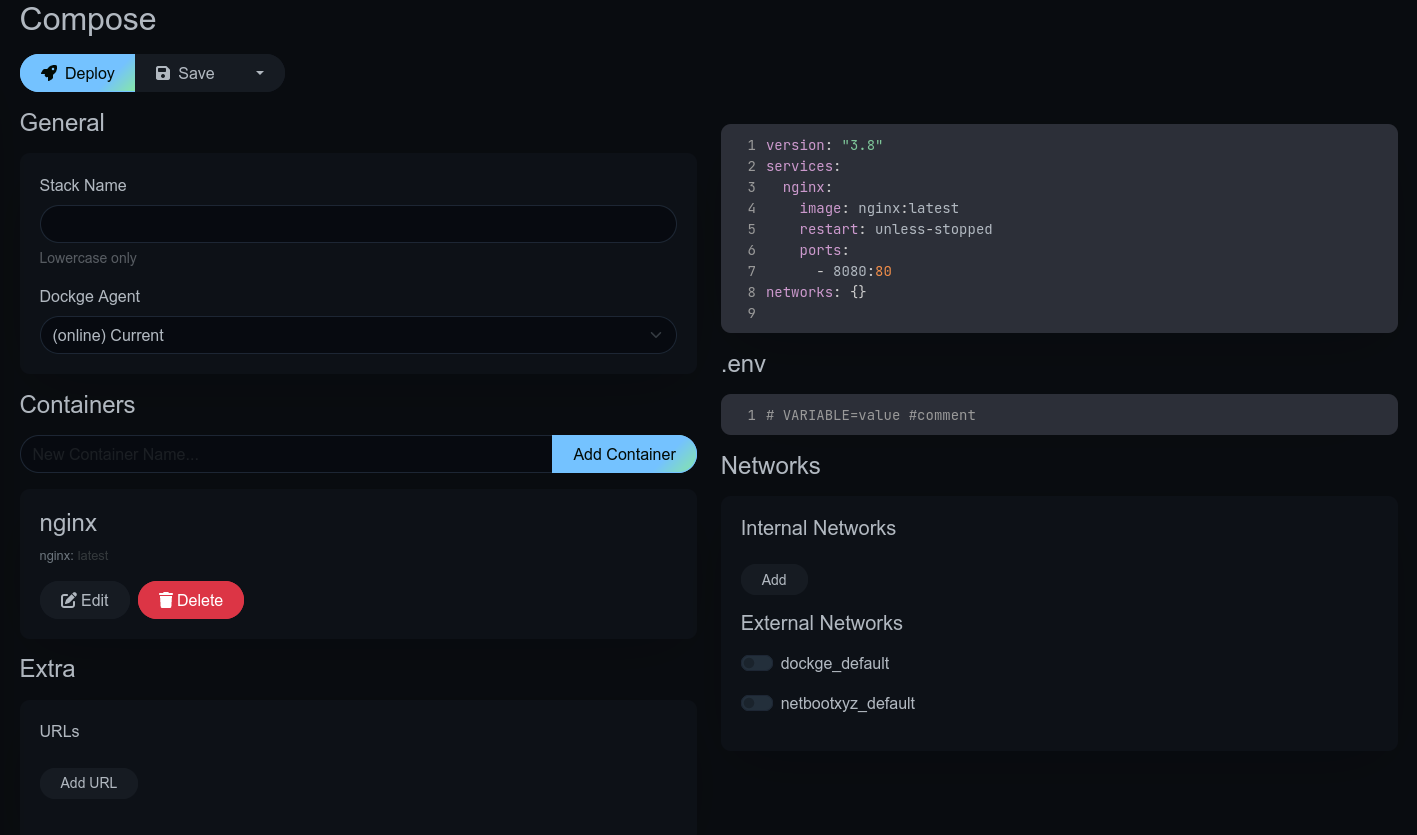
version: "3.3"
services:
  netbootxyz:
    container_name: netbootxyz
    ports:
      - 3000:3000
      - 69:69/udp
      - 8080:80
    volumes:
      - /opt/netboot/config:/config
      - /opt/netboot/assets:/assets
    restart: unless-stopped
    image: netbootxyz/netbootxyz
networks: {}
A iPXE Boot Service
Alternative docker image
services:
  netbootxyz:
    image: lscr.io/linuxserver/netbootxyz:latest
    container_name: netbootxyz
    environment:
      - PUID=${PUID}
      - PGID=${PGID}
      - TZ=${TZ}
      - PORT_RANGE=${PORT_RANGE}
    volumes:
      - ./config:/config
      - ./assets:/assets
    ports:
      - 3000:3000
      - 69:69/udp
      - 8080:80
    restart: unless-stopped
Another choice is Linuxserver.io
PUID=1000
PGID=1000
TZ=Etc/UTC
PORT_RANGE=30000:30010
#MENU_VERSION=2.0.78 #optional
#SUBFOLDER=/ #optional
#NGINX_PORT=80 #optional
#WEB_APP_PORT=3000 #optional
Using a .env file
Menu section

If your ISP connection is bad, you can edit the boot.cfg for NetBootXYZ to work locally by changing the line set live_endpoint https://github.com/netbootxyz to set live_endpoint http://<IP>:8080. If you wish to start over from scratch, you can remove the local configuration folders and upon restart of the container, it will load the default configurations.
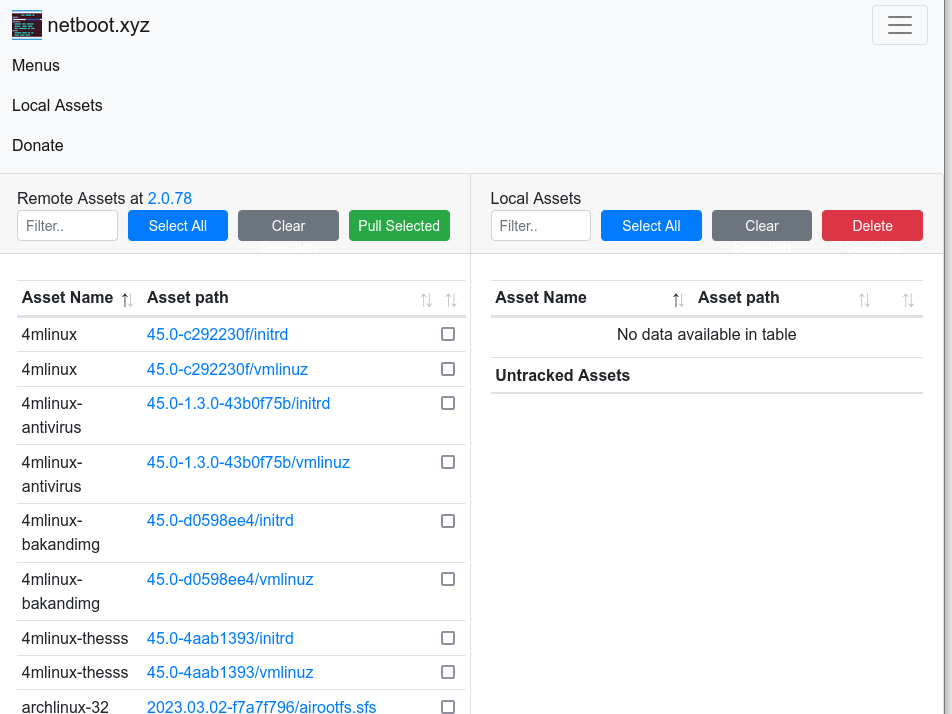
Local Assets section
Select your assets to download and hit Pull Selected.
Some OS, like Alpine, is always pulled from the internet.
Adding new releases
Edit a menu item, ubuntu.ipx and add a line for 24.04 Noble Numblat
item noble ${space} ${os} 24.04 LTS Noble Numblat- Check the rest of the file for more things to add, example Jammy:
item jammy ${space} ${os} 22.04 LTS Jammy Jellyfish

:jammy_arm64
set kernel_url ${live_endpoint}/ubuntu-squash/releases/download/22.04.4-6c390eee/
set codename jammy
set version_number 22.04.4
goto sub_boot
Example how Jammy Jellyfish is implemented
The live-ubuntu.ipxe needs more work, but it's the same idea. Consult the iPXE documentation.
Editing and personalizing an installation
Edit the menu and add or change to suite your needs
If you change any menu, remember to make a backup somewhere.
Router Setup Example
This is simply a TFTP server hosting the latest IPXE kernel builds from netboot.xyz. You need to set up a DHCP server or use a firewall with DHCP capabilities like OPNsense or pfSense. We need to set two DHCP options,
- 066 Boot Server Host Name (IP of NetBootXYZ VM) and
- 067 Bootfile Name (
netboot.xyz.efior for legacy bootnetboot.xyz.kpxe)
pfSense
Install tftpd from the Package Manager and enable it.
Services → DHCP Server → Other DHCP Options
- Option TFTP hit the Display Advanced
- Option TFTP Server – Enter the NetBootXYZ server IP
- Option Network Booting hit the Display Advanced
- Enable ☑️ Enable Network Booting
- Option Next Server Enter the NetBootXYZ server IP
- Default BIOS file name-
netboot.xyz.kpxe - UEFI 32 bit file name-
netboot.xyz.efi - UEFI 64 bit file name-
netboot.xyz.efi
netboot.xyz boot file types
The following boot file names can be set as the boot file in the DHCP configuration. They are baked into the Docker image:
| bootfile name | description |
|---|---|
netboot.xyz.kpxe | Legacy DHCP boot image file, uses built-in iPXE NIC drivers |
netboot.xyz-undionly.kpxe | Legacy DHCP boot image file, use if you have NIC issues |
netboot.xyz.efi | UEFI boot image file, uses built-in UEFI NIC drivers |
netboot.xyz-snp.efi | UEFI w/ Simple Network Protocol, attempts to boot all net devices |
netboot.xyz-snponly.efi | UEFI w/ Simple Network Protocol, only boots from device chained from |
netboot.xyz-arm64.efi | DHCP EFI boot image file, uses built-in iPXE NIC drivers |
netboot.xyz-arm64-snp.efi | UEFI w/ Simple Network Protocol, attempts to boot all net devices |
netboot.xyz-arm64-snponly.efi | UEFI w/ Simple Network Protocol, only boots from device chained from |
netboot.xyz-rpi4-snp.efi | UEFI for Raspberry Pi 4, attempts to boot all net devices |
Note on using NetBootXYZ
You might need some extra RAM during the installation.
References
iPXE [1] Networkbooting [2] NetBootXYZ [3] Docker [4] Dockge [5] TFTP Protocol [6] Linuxserver [7] image


