Virtual pfSense on Proxmox
We all need firewalls, and we can virtualize them or use HW versions It's best practice to use hardware firewalls. Netgate is a pfSense in a box with add on features. We will also add the QEMU Guest Agent to FreeBSD. #pfsense #virtual #router #firewall


We all need firewalls, and we can virtualize them or use HW versions.
It's best practice to use hardware firewalls. Netgate is a pfSense in a box with add on features. They have low cost entry level boxes to use, Netgate 1100 Small Office version is good for home use. Netgate 1100 or 2100
Netgate 1100 has 1G memory and 8G storage next size up is the 2100 with 4G and 8 — 32G storage, prices ca. 150 to 350.

pfSense setup on Proxmox
First, you should download the software from: https://www.pfsense.org/download/. We use Community Edition and it's latest Stable Version.
There are different views and thoughts on if a VM can provide adequate isolation for a Firewall to provide network security. Flaws in the underlying software, hardware and/or misconfiguration, can undermine the security of your entire system.
If you run a very complex 10G network with tons of NAT:ing you will need a heavy setup to cope. And at 40G and 100G, it's recommended to only use HW router/firewalls with good ventilation.
For your needs, see Netgate docs for their HW stuff and add 1-2%.
But for normal home labs, I found these settings working. See Netgate docs for their HW stuff and add 1-2%.
The Download
Go to this page and copy the download link and the SHA256 Checksum.
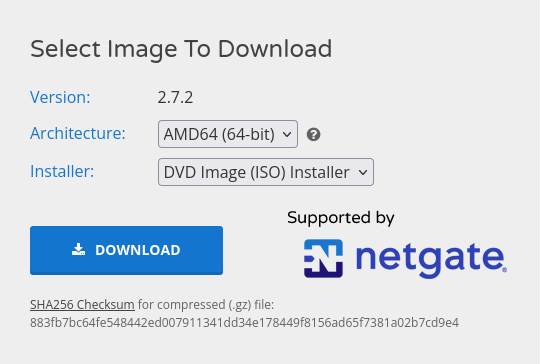
And download the ISO file to your storage.
The VM
We need a VM: 1G memory, 1 core, 8 G of disk and 2 networks
Make it start at boot as number 1.
Disk
- 8G or 16G
- set the advanced flag IO thread,
should improve IO performance by giving the disk its own worker thread - storage on local-lvm
Memory
- 1G or 2G
- Disable the Ballooning Device
Network
For large or heavy loaded networks, you should install ethtools and set the combined value and configure the virtio Multique value.
Set Multique to 8 on both vmbr0 and vmbr1 (8 vcpu VM)
allow the BSD kernel to negotiate the optimal value with Proxmox.
If you are using the VirtIO driver, you can optionally activate the Multiqueue option. This option allows the guest OS to process networking packets using multiple virtual CPUs, providing an increase in the total number of packets transferred.
When using the VirtIO driver with Proxmox VE, each NIC network queue is passed to the host kernel, where the queue will be processed by a kernel thread spawned by the vhost driver. With this option activated, it is possible to pass multiple network queues to the host kernel for each NIC.
When using Multiqueue, it is recommended to set it to a value equal to the number of Total Cores of your guest. You also need to set in the VM the number of multipurpose channels on each VirtIO NIC with the ethtool command:
ethtool -L eth1 combined 8
- disable Firewall on both
- If needed, specify a specific MAC address.
Here is a VLAN example /etc/network/interfaces file:
    auto vmbr0
    iface vmbr0 inet dhcp
        bridge_ports eth0
        bridge_stp off
        bridge_fd 0

    iface eth1.123 inet manual
        vlan-raw-device eth1

    auto vmbr123
    iface vmbr123 inet manual
            bridge_ports eth1.123
            bridge_stp off
            bridge_fd 0

# There are different views and thoughts if privileged and unprivileged VLAN's should share the same physical links and hardware.
General
- Disable Use tablet pointer, we have no use for it.
Start the VM
- Do initial Configuration and reboot.
WARNING if you set DHCP on, it will take over the show
Post-Install Configuration
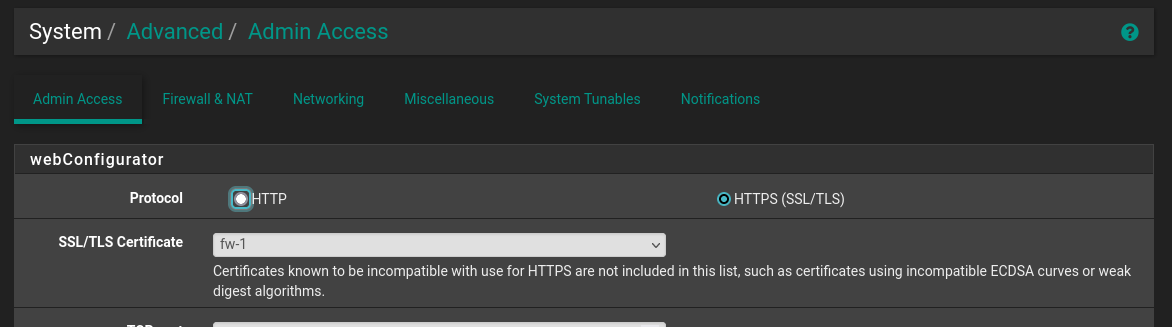
- Ensure that the following are ticked in System — Advanced — Networking tab :
- Hardware Checksum Offloading
- Hardware TCP Segmentation Offloading
- Hardware Large Receive Offloading.
Reboot
And now you can configure pfSense to your liking
Do not end the domain name with '.local' as the final part (Top Level Domain, TLD), The 'local' TLD is widely used by mDNS (e.g. Avahi, Bonjour, Rendezvous, Airprint, Airplay) and some Windows systems and networked devices. These will not network correctly if the router uses 'local' as its TLD. Alternative TLDs such as 'local.lan' or 'mylocal' are safe.
Setup and Activate ACME
Let's Encrypt certificates are free and easy to get. First, install the ACME package. Then, sign up to an account using your email and order,
first, a Staging Certificate.
When all is working, order a Production Certificate and activate it.
Go to: Services → Acme → Certificate options: Edit → Certificates
Select a Private Key strength: 4096-bit RSA is fine.
RSA 2048 is not recommended anymore, it's too easy to crack.
Select Shell Command and enter /etc/rc.restart_webgui. This way, a new certificate will be activated.
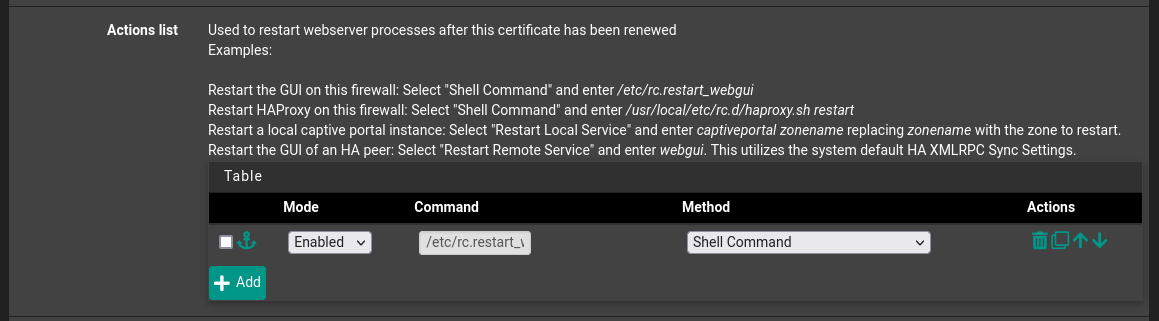
Activate the new certificate for the pfSense to use.
Homepage - Widget
To have Homepage shoving status values, we use the pfSense Widget.
For it to function, we need to add an API.
Install the API as Admin. Only allow API calls with read access.
pkg -C /dev/null add https://github.com/jaredhendrickson13/pfsense-api/releases/latest/download/pfSense-2.7-pkg-API.pkg && /etc/rc.restart_webguiAdd this to Homepage services.yaml
- Network Services:
    - pfSense:
        icon: pfsense.svg # mdi-wall-fire
        href: https://10.100.100.1
        description: Firewall
        ping: https://10.100.100.1
        provider: pfsenseapi
        widget:
          type: pfsense
          fields: ["load", "memory", "wanStatus", "wanIP"] # NOTE Only 4 can be used
          url: https://fw.example.com
          username: admin
          password: password
          wan: igb0
Use only 4! "load", "memory", "temp", "wanStatus", "wanIP", "disk"
To update run pfsense-api update. Uninstall the API by pfsense-api delete.
WireGuard VPN
To access your stuff from remote places, you require a VPN. Previously I discussed using PiVPN. With pfSense, it's WireGuard or OpenVPN. I prefer WireGuard.
How to set it up is explained in this blog.
QEMU Guest Agent
Setting up a QGA on FreeBSD is special.
Open a shell, console option 8
# Install the QGA package
pkg install -y qemu-guest-agent

#Setup the QGA
vi /etc/rc.conf.local
# Add 2 lines to the empty file
qemu_guest_agent_enable="YES"
qemu_guest_agent_flags="-d -v -l /var/log/qemu-ga.log"
Start edit, type i - end by hitting ESC :wq
Activate the QGA
From the Package Manager, Install Shellcmd.
Open Services: Shellcmd Settings / Edit and enter the following:
- Command
service qemu-guest-agent start - Shellcmd Type
earlyshellcmdand hitSave.
Go to Diagnostics / Reboot to reboot pfSense


