Hardening Servers - 2
Security measures to make Servers more secure. This second part is about users. Segregation of duties is key to enhancing security. We do it by segregating tasks a user is allowed to do. A newly installed server's security is 60-70%, meaning there is a lot to do.


What are the first and minimal things to do
- Do not use root to log in to the networked management interface or SSH
- Create SSH-keys to identify your different ID's and different servers
- one per server per user ID
- Create PVE groups: Datacenter → Permissions → Groups + Add
- grant permissions Datacenter → Permissions → Add Group permissions
- Create a new PVE user in Datacenter → Permissions → Users
- test that you can log in and do stuff
- root not to log in anymore
- Activate Two-Factor Authentication (2FA or MFA)
- Use tokens for apps to access the node
System administrator
The system’s root user can always log in via the Linux PAM realm and is an unconfined administrator. This user cannot be deleted, but attributes can still be changed. System mails will be sent to the email address assigned to this user.
Groups
Each user can be a member of several groups. Groups are the preferred way to organize access permissions. You should always grant permissions to groups instead of individual users. That way, you will get a much more maintainable access control list.
Pools
Pools can be used to group a set of virtual machines and data stores. You can then simply set permissions on pools (/pool/{poolid}), which are inherited by all pool members. This is a great way to simplify access control.
User Configured TOTP Authentication
Users can choose to enable TOTP or WebAuthn as a second factor on login, via the TFA button in the user list (unless the realm enforces YubiKey OTP).
Users can always add and use one time Recovery Keys.
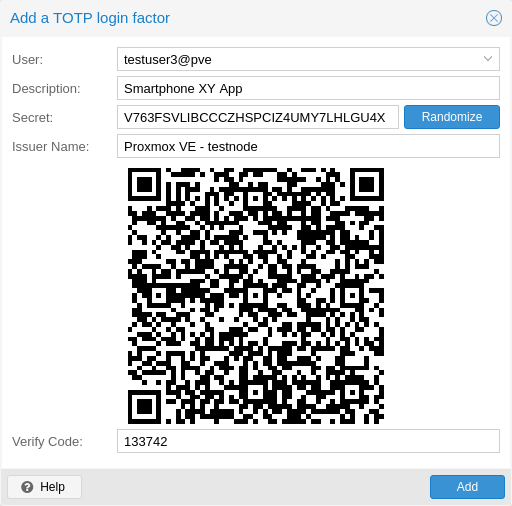
After opening the TFA window, the user is presented with a dialog to set up TOTP authentication. The Secret field contains the key, which can be randomly generated via the Randomize button. An optional Issuer Name can be added to provide information to the TOTP app about what the key belongs to. Most TOTP apps will show the issuer name together with the corresponding OTP values. The username is also included in the QR code for the TOTP app.
After generating a key, a QR code will be displayed, which can be used with most OTP apps such as FreeOTP. The user then needs to verify the current user password (unless logged in as root), as well as the ability to correctly use the TOTP key, by typing the current OTP value into the Verification Code field and pressing the Apply button.
TOTP
There is no server setup required. Simply install a TOTP app on your smartphone (for example, FreeOTP) and use the Proxmox Backup Server web-interface to add a TOTP factor.
WebAuthn
For WebAuthn to work, you need to have two things:
A trusted HTTPS certificate (for example, by using Let’s Encrypt). While it probably works with an untrusted certificate, some browsers may warn or refuse WebAuth operations if it is not trusted.
Set up the WebAuth configuration (see Datacenter → Options → WebAuthn Settings in the Proxmox VE web interface). This can be autofilled in most setups.
Once you have fulfilled both of these requirements, you can add a WebAuthn configuration in the Two Factor panel under Datacenter → Permissions → Two Factor.
Recovery Keys
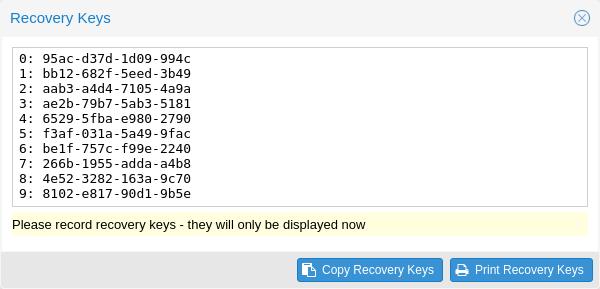
Recovery key codes do not need any preparation; you can simply create a set of recovery keys in the Two Factor panel under Datacenter → Permissions → Two Factor.
per user at any time.


